
Developing an app is not one long coding task. It is a sequence of decisions: which problem deserves solving, what the first release must do, how people will use it, which platform fits, and how the team will know it works. Get those decisions wrong and even polished code can deliver the wrong product.
This guide walks product managers, founders, designers, and engineers through the app development process from idea to launch. Each step ends with a deliverable you can review before committing more time and money.
1. What does developing an app involve?
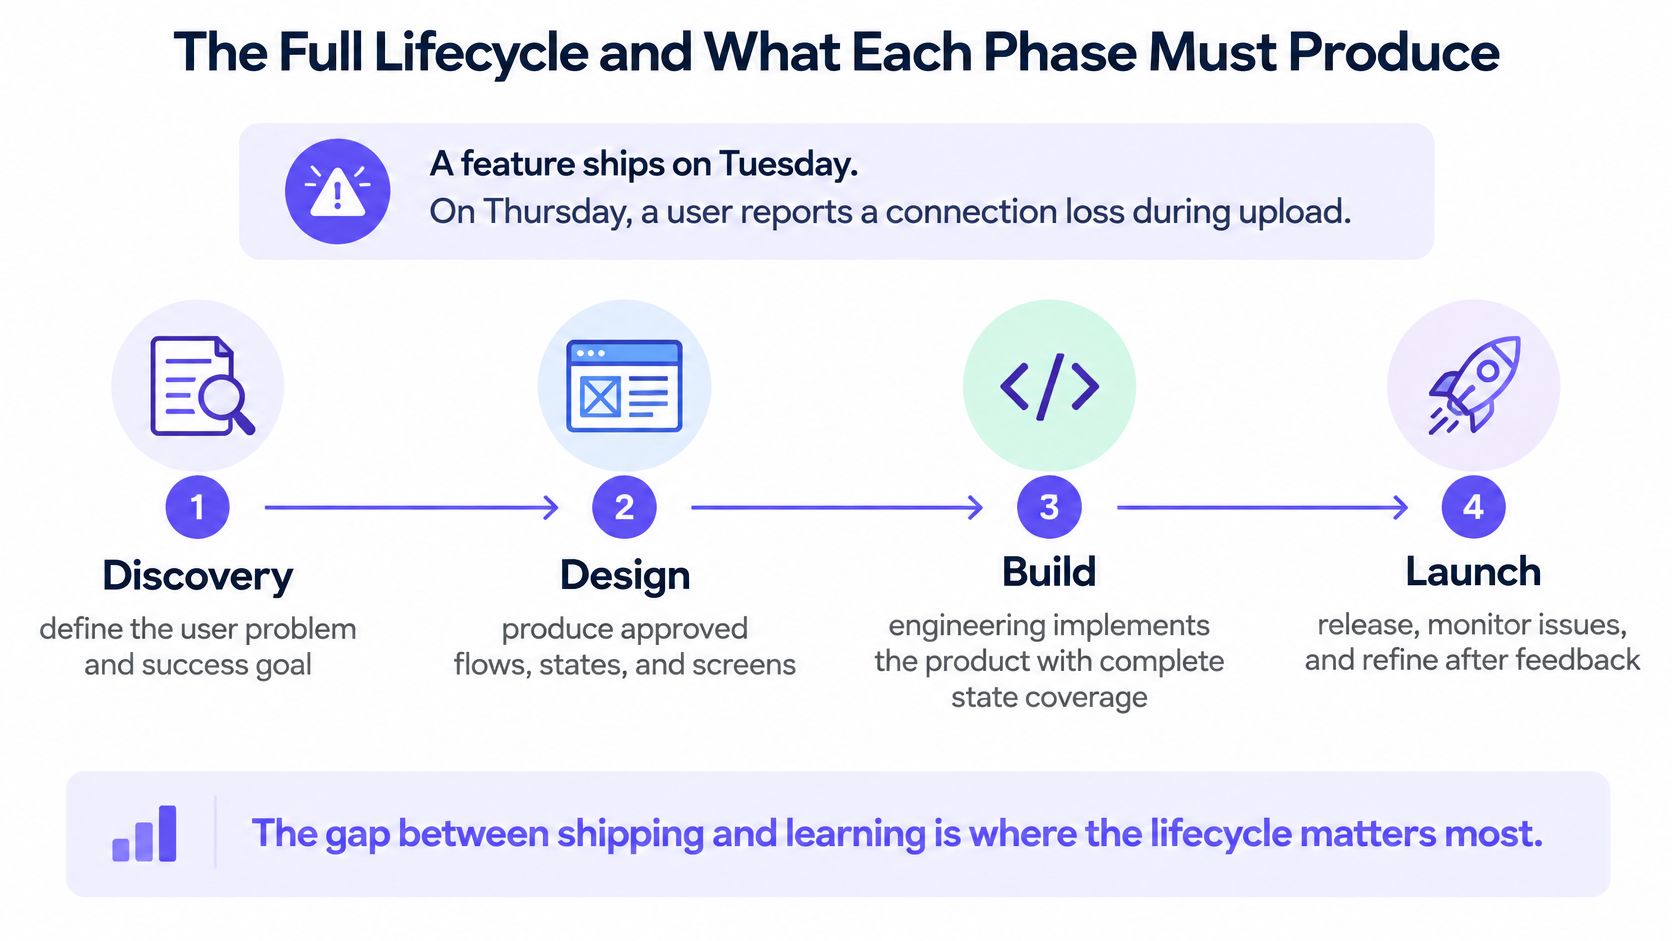
The app development lifecycle typically runs from discovery and requirements through design, prototyping, implementation, testing, release, and iteration. The work is collaborative: a product owner defines priorities, a designer resolves journeys and states, engineers choose and build the architecture, and QA verifies behavior. Depending on the product, you may also need security, accessibility, data, and operations specialists.
Stage: Validate
Deliverable: Problem statement and evidence
Decision before moving on: Is the problem worth solving?
Stage: Plan
Deliverable: MVP scope, PRD, acceptance criteria
Decision before moving on: What does the first release include?
Stage: Design
Deliverable: Journeys, wireframes, states, prototype
Decision before moving on: Can users complete the core task?
Stage: Build
Deliverable: Working frontend, backend, integrations
Decision before moving on: Does the implementation meet the specification?
Stage: Test and release
Deliverable: QA results, release plan, monitoring
Decision before moving on: Is the product safe and ready to operate?
Stage: Iterate
Deliverable: Usage review and prioritized backlog
Decision before moving on: What should change next?
Your platform changes the work. A web app runs in a browser and needs responsive layouts, browser testing, hosting, and deployment. A native mobile app uses platform-specific iOS or Android tooling and must account for device permissions, operating-system behavior, and store submission. A cross-platform mobile app shares much of its code across iOS and Android but still needs testing and release work for each platform. A web app packaged as a progressive web app is not automatically a substitute for a store-distributed native app.
The steps below apply to all three paths, but the technical and release checklists should match the platform you actually choose.
2. Validate the problem before building an app
Start with a narrow question: Who has the problem, when does it occur, and what do they do today? “Teams need a better dashboard” is not yet a useful problem statement. “Account managers lose track of renewal approvals across email and spreadsheets” gives you a journey to investigate.
Interview prospective users, observe their current workflow, and review support requests, analytics, or sales notes if you already have a product. Look at competing products to understand available alternatives, not to assemble a feature wishlist. Write down which assumptions are supported by evidence and which still need testing.
A compact discovery record should contain:
- Target user and situation: who experiences the problem and under what conditions.
- Current workaround: what they use now and where it fails.
- Value proposition: the specific improvement your app promises.
- Demand assumption: what evidence would show enough interest to proceed.
- Highest-risk unknown: the behavior, integration, or constraint most likely to change the plan.
Choose methods for user research that can answer the highest-risk question. For a new product, that might mean observing a few real tasks before debating interface details. For an existing product, it might mean inspecting where users abandon a flow. Do not treat compliments about an idea as proof that people can or will use the finished app.
Exit deliverable: a one-page problem brief, research notes, and a list of assumptions to test.
3. Define requirements and a realistic MVP
An MVP is the smallest release that can deliver and test the core value, not an unfinished version of every feature. Trace the day-one journey from entry to a useful outcome. If the user must create an account, invite a colleague, and approve a request to reach that outcome, specify each dependency. Defer features that do not help the journey work or answer a critical product question.
Turn the journey into a product requirements document (PRD) with the problem, audience, scope, exclusions, user stories, dependencies, measurable success criteria, and open questions. For each important story, add acceptance criteria that design, engineering, and QA can all test.
For example: “If an approval request fails to send, the user sees that it was not submitted, can retry without creating a duplicate, and does not see a false success message.” That is more useful than “Handle errors gracefully.” Include empty, loading, permission-denied, offline, expired-session, and recovery behavior where relevant.
Prioritize features against user value, technical effort, and dependencies. Assign an owner to external integrations: if publishing to another service is essential, plan for cross-posting integration challenges before promising the flow. Define success metrics such as completion of the core journey and return usage, then decide which events must be instrumented to measure them.
Exit deliverable: a PRD with an explicitly bounded MVP, acceptance criteria, edge cases, and measurement plan.
4. Map user flows and design the interface
NASA analysis of error-cost escalation
Information architecture tells users where things live; a user flow shows how they reach an outcome. Draft the flow before polishing screens. Map entry points, choices, permissions, errors, and return paths so the team can see where the product may strand someone.
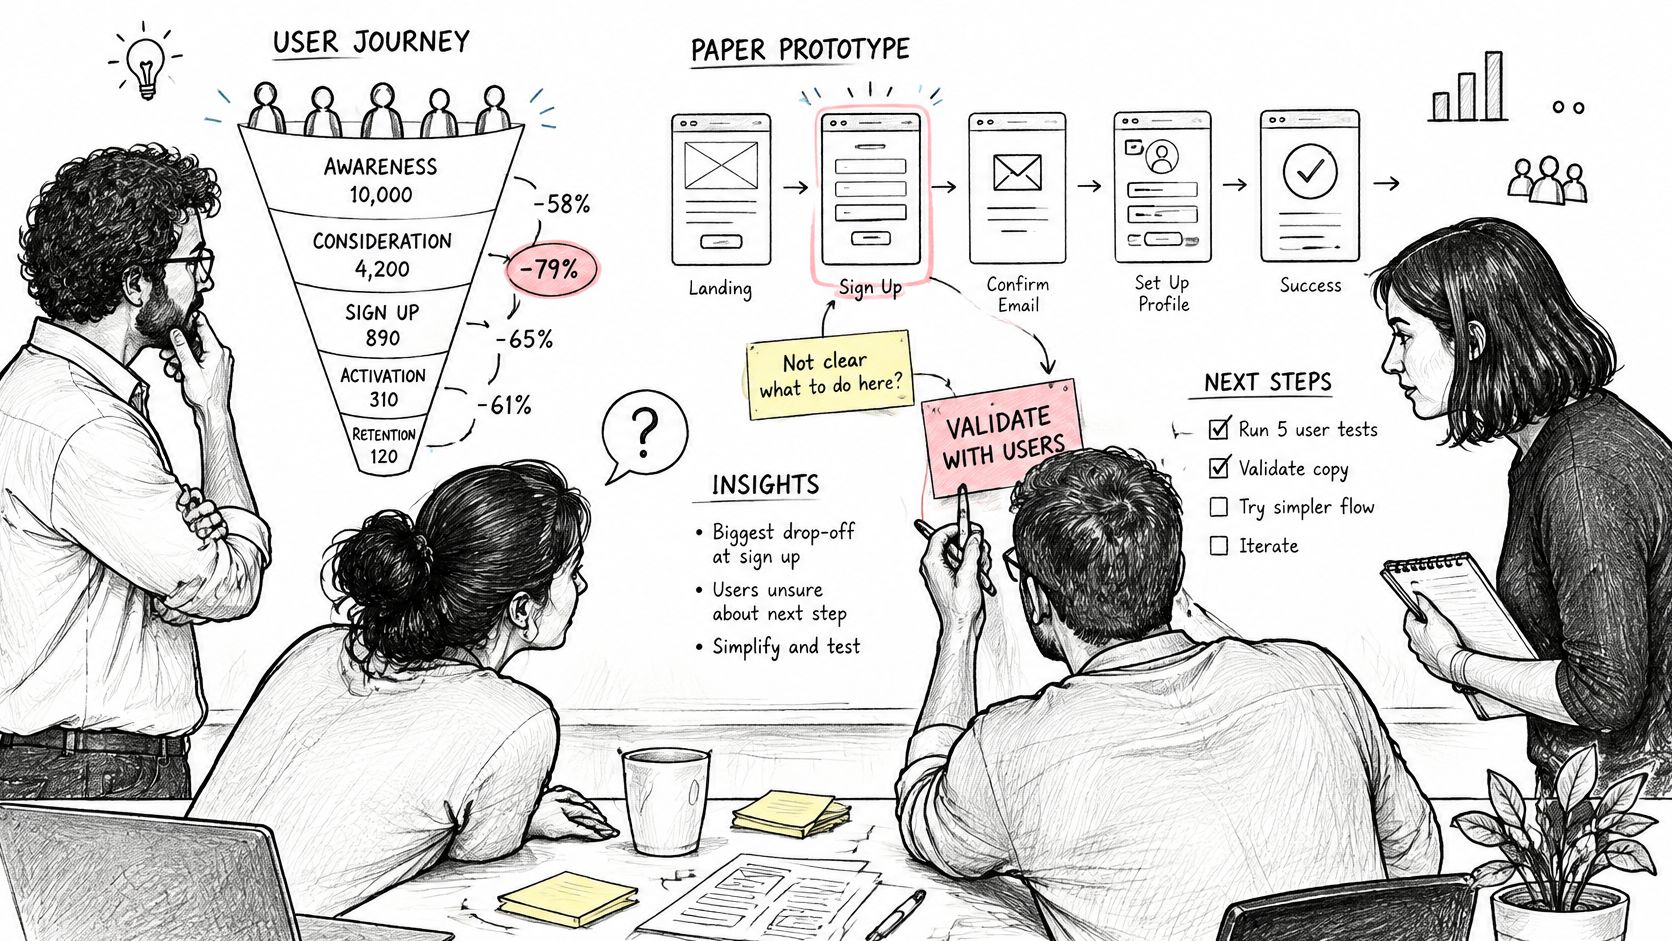
Move from rough wireframes to interface designs using your existing components, tokens, and content patterns where possible. Check that labels describe actions clearly and that the same action behaves consistently throughout the app. Web layouts need to work across intended screen sizes and input methods; mobile designs must account for platform navigation, touch interaction, and system permissions.
Accessibility belongs in these decisions, not at the end. Document focus order, control names, readable text, and recovery from errors. Apple’s accessibility guidance emphasizes interfaces that remain perceivable and adaptable, while Android’s testing guidance recommends combining tools with manual and assistive-technology testing.
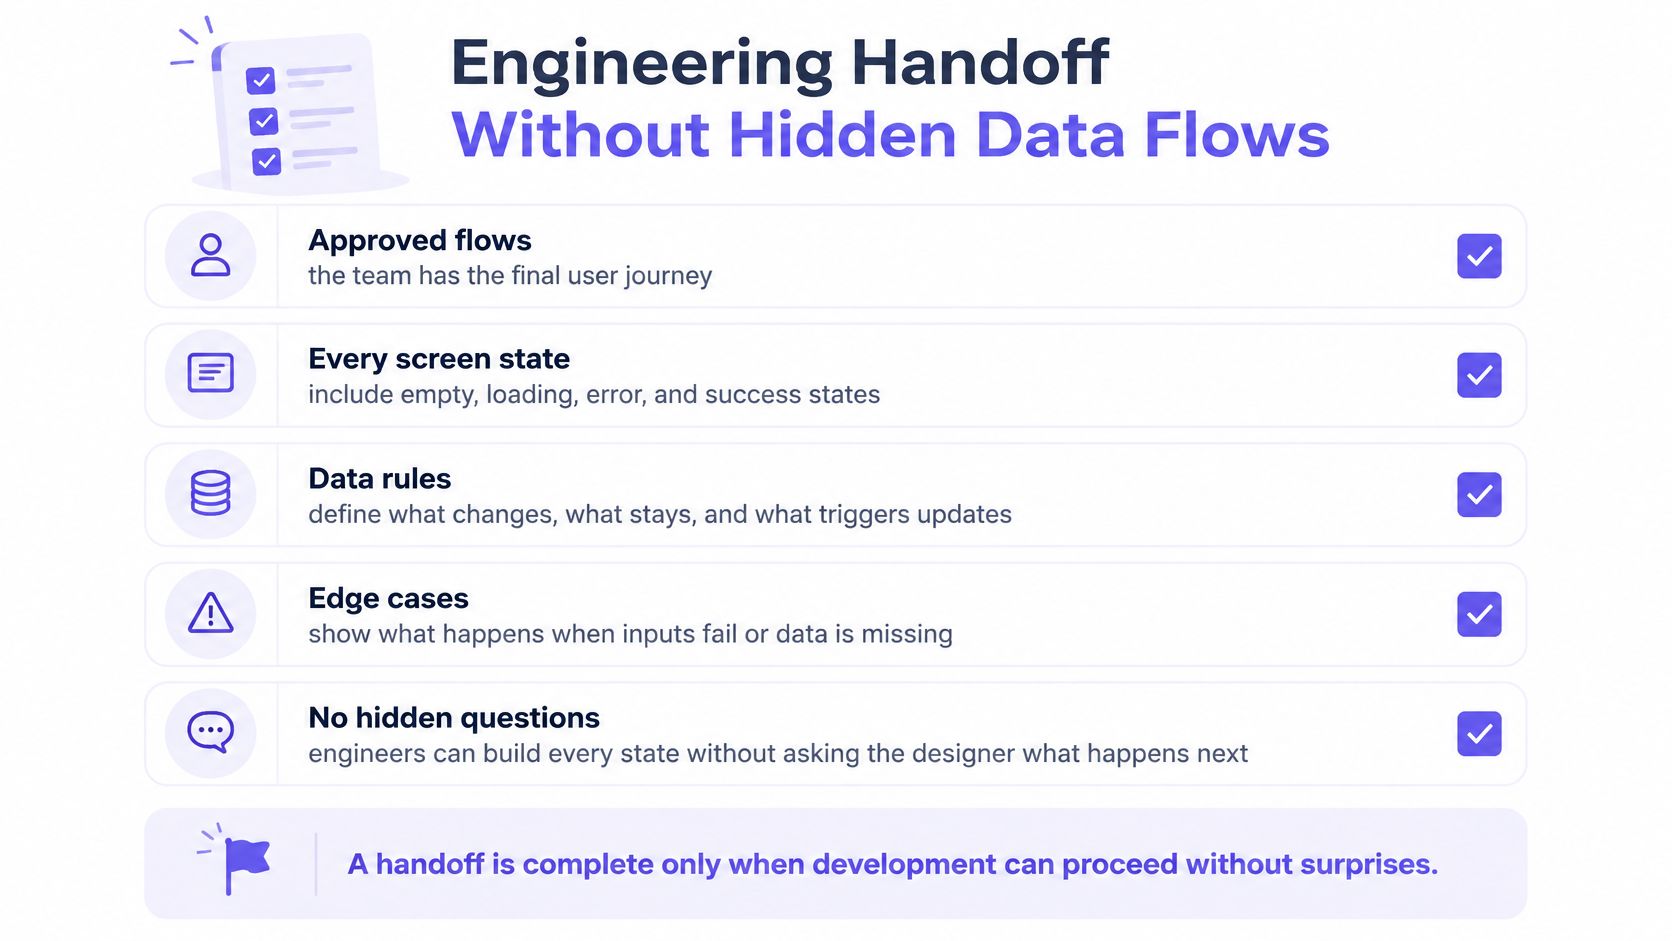
Before handoff, package more than finished screens: include flow diagrams, a state inventory, copy, component mapping, and unresolved trade-offs. Following developer handoff best practices makes the intended behavior easier for engineers and QA to verify.
Exit deliverable: approved flows and designs that specify how the main task works in normal and failure conditions.
5. Prototype, test, and revise the critical journey
A clickable prototype lets a team find confusing decisions before engineering implements them. Build the smallest flow that tests the important question. If onboarding is uncertain, prototype first open to first useful result rather than reproducing every settings screen.
Give participants a task without narrating where to tap. Watch whether they finish, where they hesitate, what they misunderstand, and whether they recover from an error. Include representative devices and accessibility needs. Test relevant empty, loading, and failure states instead of presenting only a polished success path.
Set the pass condition before a session. That might be an observed ability to complete the task without help, with qualitative notes explaining failures. Do not borrow a universal conversion benchmark from another product. After a structural change, retest the affected journey; a favorable comment is not evidence that a task works.
Nielsen Norman Group mobile usability research
A rapid prototyping approach is useful when each iteration answers a specific question. Keep defects that blocked completion in the future regression suite.
Exit deliverable: a tested prototype, findings, revised states, and a decision to proceed or redesign.
6. Choose the development approach and architecture
Choosing how to develop an app depends on the user experience, platform reach, technical constraints, and the team you can support. Compare approaches against requirements rather than trends.
Approach: Web app
Consider it when: Browser access and rapid deployment matter
Check before committing: Browser support, responsive behavior, hosting, and any offline needs
Approach: Native iOS or Android
Consider it when: Deep platform integration or platform-specific experience matters
Check before committing: Separate skills, device testing, and store operations
Approach: Cross-platform mobile
Consider it when: Shared code across mobile platforms is valuable
Check before committing: Native integrations, accessibility, performance, and platform-specific QA
Approach: Low-code or no-code
Consider it when: A limited workflow can be built within a tool’s constraints
Check before committing: Data portability, customization, security, integrations, and ongoing fees
Then outline the architecture: frontend, APIs, backend services, database, authentication, and integrations. Decide where sensitive data is collected and stored, who can access it, and how deletion will work. List third-party SDKs and their data flows before implementation. The right architecture supports the first release without pretending to predict every future feature.
Security requirements vary by product. Threat-model the valuable data and abuse cases, restrict access, protect secrets, and schedule dependency reviews. If the app handles payments, healthcare data, or regulated information, bring the appropriate specialists into planning. For a mobile product, use the OWASP Mobile Application Security Verification Standard as a security-requirements reference rather than assuming a successful store review proves security.
Exit deliverable: a platform decision, architecture sketch, integration inventory, and documented technical risks.
7. Build, test, and prepare for launch
Engineers implement the frontend and backend against the agreed flows and acceptance criteria. Keep design and QA involved as the product takes shape: real data, latency, and device behavior reveal states that static screens miss. A useful handoff includes data contracts, accessible control behavior, error copy, and ownership of each integration.
Test at several levels: automated unit and integration tests, end-to-end checks for core journeys, manual exploratory QA, performance checks, security review, and accessibility testing on target devices. Run screen-reader or other assistive-technology checks as appropriate. Automation catches repeatable issues; a person still needs to confirm whether the task makes sense.
For a web app, verify supported browsers, responsive breakpoints, deployment configuration, monitoring, and rollback. For mobile, allow time for platform-specific signing, metadata, device testing, and store review. Apple requires app privacy details that account for integrated third-party SDKs; check its submission guidance and review rules before uploading. Google Play’s target API requirements change over time, so confirm the applicable requirement for your planned release date rather than relying on an old checklist.
SC Media report on mobile app risks from large-scale assessments
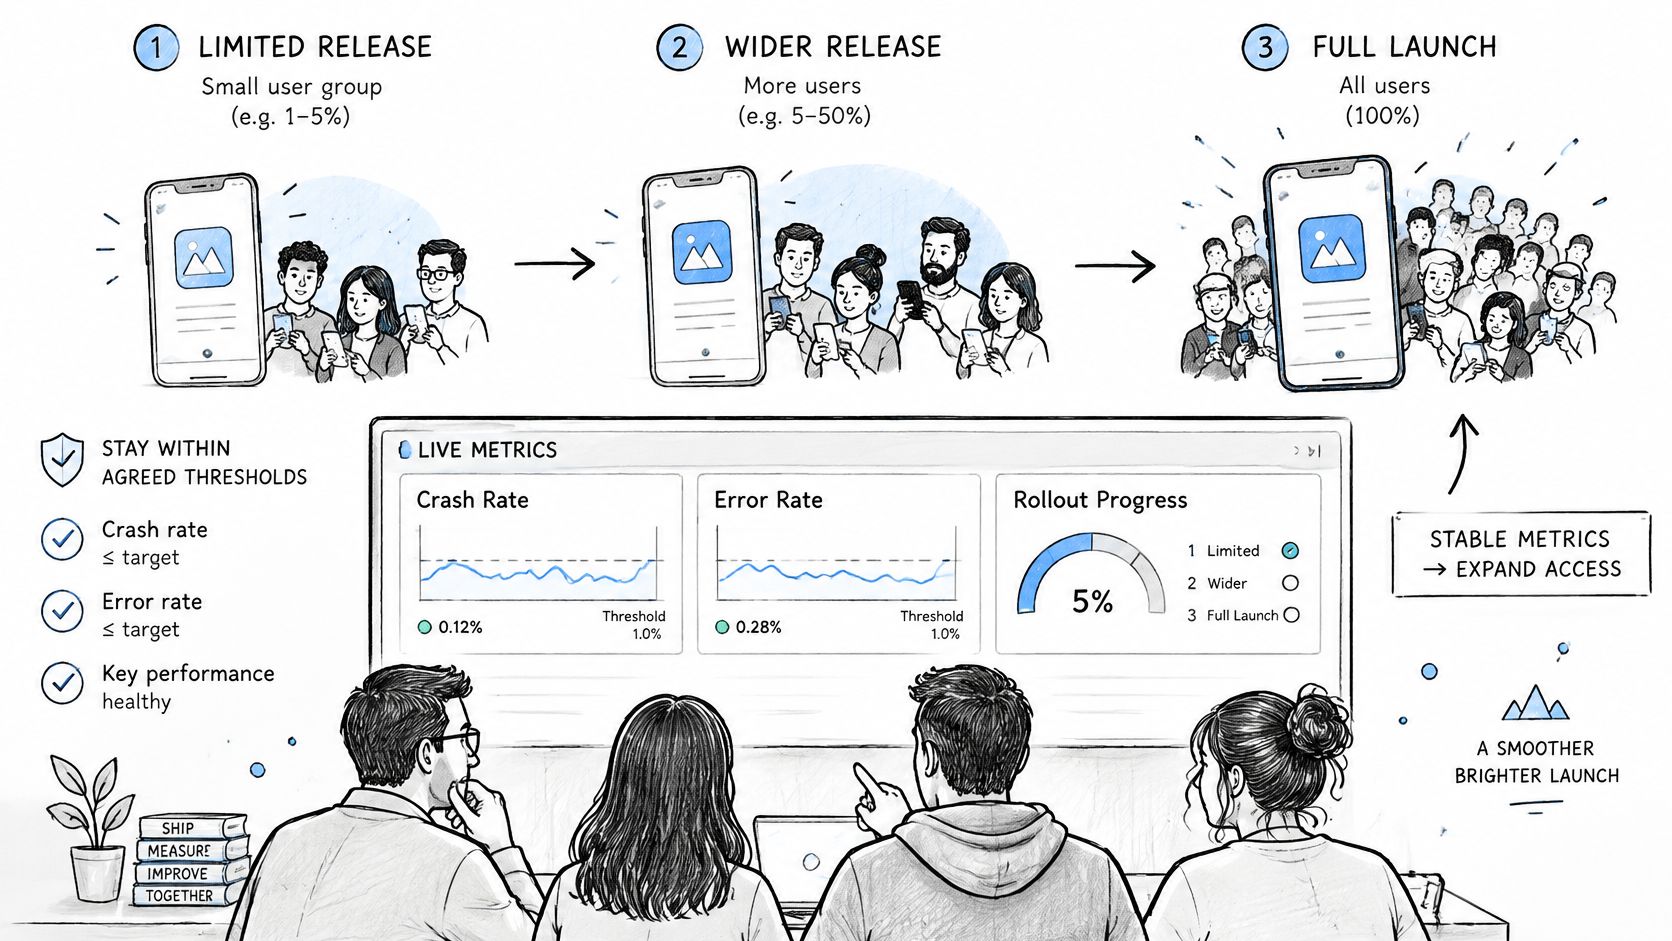
Instrument the critical journey before release. If possible, roll out in stages, watch crashes, errors, and task completion, and define in advance when to pause or roll back. After launch, review activation, retention, support reports, and recurring defects on a regular cadence. Use A/B testing best practices when comparing changes, rather than declaring a winner from a small, noisy first cohort.
Exit deliverable: a tested release, operational owner, monitoring plan, and prioritized post-launch backlog.
8. Estimate app development cost and timeline
App development cost depends on scope, platform count, integrations, data sensitivity, design complexity, accessibility requirements, team rates, and maintenance needs. The same app idea can yield very different estimates when one proposal includes discovery, QA, and operations and another counts only coding.
Use a bottom-up estimate instead of an unsupported “average app” price. Break the MVP into design, frontend, backend, integration, QA, security, deployment, and project coordination tasks. Estimate effort for each with the people doing the work, multiply by the relevant rates, and add expected infrastructure, third-party services, and an explicit allowance for uncertainty. Document assumptions and present a range. Estimate the schedule from dependencies, staffing, review cycles, and external approvals, not by dividing total hours by a single developer’s workweek.
Cost bucket: Product and design
Questions to price: What discovery, research, prototypes, and design-system work are needed?
Cost bucket: Engineering
Questions to price: Which platforms, APIs, backend services, and integrations are in scope?
Cost bucket: Verification
Questions to price: What QA, device coverage, accessibility, and security work is required?
Cost bucket: Release and operation
Questions to price: What hosting, monitoring, store administration, support, and maintenance recur?
Illustrative calculation, not a market quote: if a scoped release is estimated at 800 team-hours and the team’s agreed blended rate is $100 per hour, labor is $80,000 before infrastructure, external fees, taxes, and uncertainty allowance. Those inputs are hypothetical; replace them with your own task estimates and actual rates. An MVP with fewer integrations may cost less, while additional platforms or compliance work can change the estimate substantially.
peer-reviewed ACM study of 479 mobile apps
Use an official AWS Pricing Calculator or Google Cloud Pricing Calculator for modeled cloud usage, then revise the estimate as actual usage becomes known. Set aside a separate operating budget for updates, security fixes, customer support, and post-launch changes.
9. Avoid the mistakes that create rework
Most costly mistakes begin as decisions the team assumed someone else had made. Review these risks at each gate:
- Unvalidated demand: validate the user’s current problem before expanding the feature list.
- Feature bloat: protect the core journey and make exclusions visible in the PRD.
- Missing states: specify denied permissions, timeouts, empty results, failed actions, and recovery.
- Inconsistent UI: reuse established components and document legitimate exceptions.
- Handoff by screenshot: provide behavior, data flows, accessibility details, and acceptance criteria.
- Testing only the happy path: test critical tasks with real devices, realistic data, and assistive technology.
- No post-launch owner: assign responsibility for monitoring, maintenance, and product decisions.
A useful retrospective traces each defect back to the earliest stage where it could have been found. If the same category recurs, improve that gate rather than adding another generic checklist.
validate mobile accessibility with assistive technology
10. How Figr helps before development
Suppose a B2B SaaS team is adding a renewal-approval feature. The PM has a PRD, support findings, existing screens, and a design system. Engineering needs an agreed flow that covers requester, approver, expired link, and failed notification states before implementation.
Figr is an AI product design agent for this planning-to-handoff work, not an automated end-to-end app builder. Its Context Pod can bring together product materials such as PRDs, research, screens, and design references. The team can use UX Reasoning to explore the approval journey and its trade-offs, map user flows and edge cases, and iterate on a multi-state prototype. Design System Intelligence helps align the work with existing components and rules; Direct Editing supports canvas-level prototype changes, and the result can move into a Figma-ready design workflow. See Figr’s product discovery explanation and official changelog for documented capabilities.
Its Visual Context Graph connects five kinds of context so a new design is not detached from the existing product:
- Visual: current screens and layouts.
- Behavioral: flows and interaction patterns.
- Design system: components, tokens, variants, and usage rules.
- Product knowledge: requirements, research, and decisions.
- Implementation: relevant code and technical constraints.
In the example, the team can compare approval-flow alternatives, review failure states with engineering and QA, revise the prototype, and hand off Figma-ready output grounded in that shared context. Engineers still build the feature, choose the production architecture, test the implementation, and run the release.
Frequently asked questions
What are the steps to developing an app?
Validate the problem, define the MVP and requirements, design flows, test a prototype, choose the technology, build and test, launch, then iterate using real usage data.
How much does it cost to develop an app?
There is no reliable universal price. Estimate scoped team-hours at actual rates, then add infrastructure, third-party services, release work, maintenance, and uncertainty.
How long does it take to develop an app?
It depends on the scope, platforms, integrations, team capacity, and review cycles. Estimate each workstream and its dependencies, then revise the schedule as discovery reduces uncertainty.
Should I build a web app or a mobile app?
Choose web for browser-first access and deployment; consider mobile when the product needs a platform-specific experience or device capabilities. Validate the choice against users and technical constraints.
Can Figr build my app for me?
No. Figr helps teams explore requirements, design flows and prototypes, and prepare design handoff. Engineering builds, tests, deploys, and operates the app.
The best next step in developing an app is to identify the decision your team is still guessing about. Write its pass condition, test it with the smallest useful artifact, and move forward with evidence rather than a prettier assumption.
If your team is developing an app and losing weeks to late questions, bring your screens, specs, and analytics into Figr and draft the flows, edge cases, and acceptance criteria before engineering starts. You'll test decisions while they're still cheap to change, and you'll hand over artifacts your engineers and QA can build from.