PRODUCT TOUR

From product context to design, native to your product.

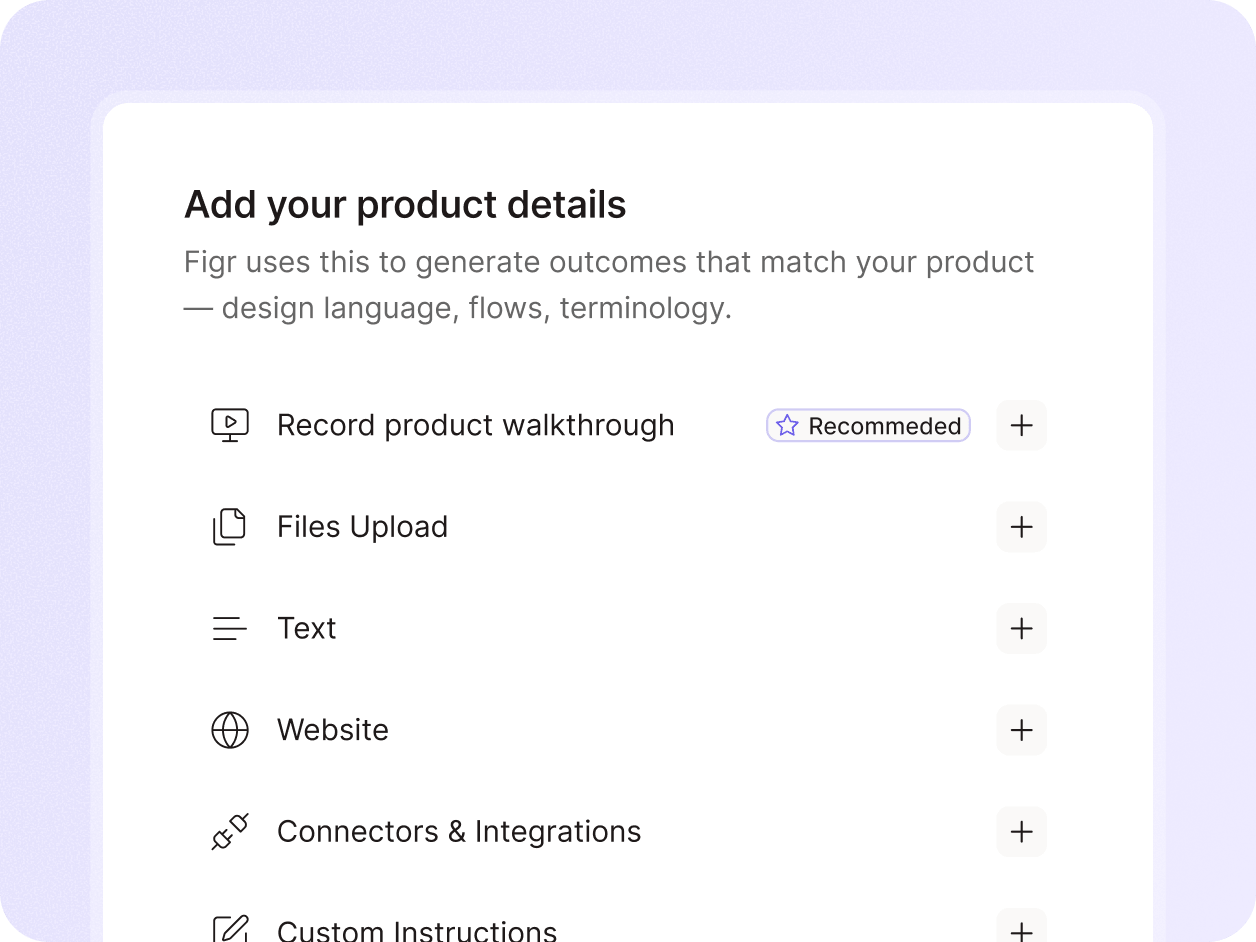
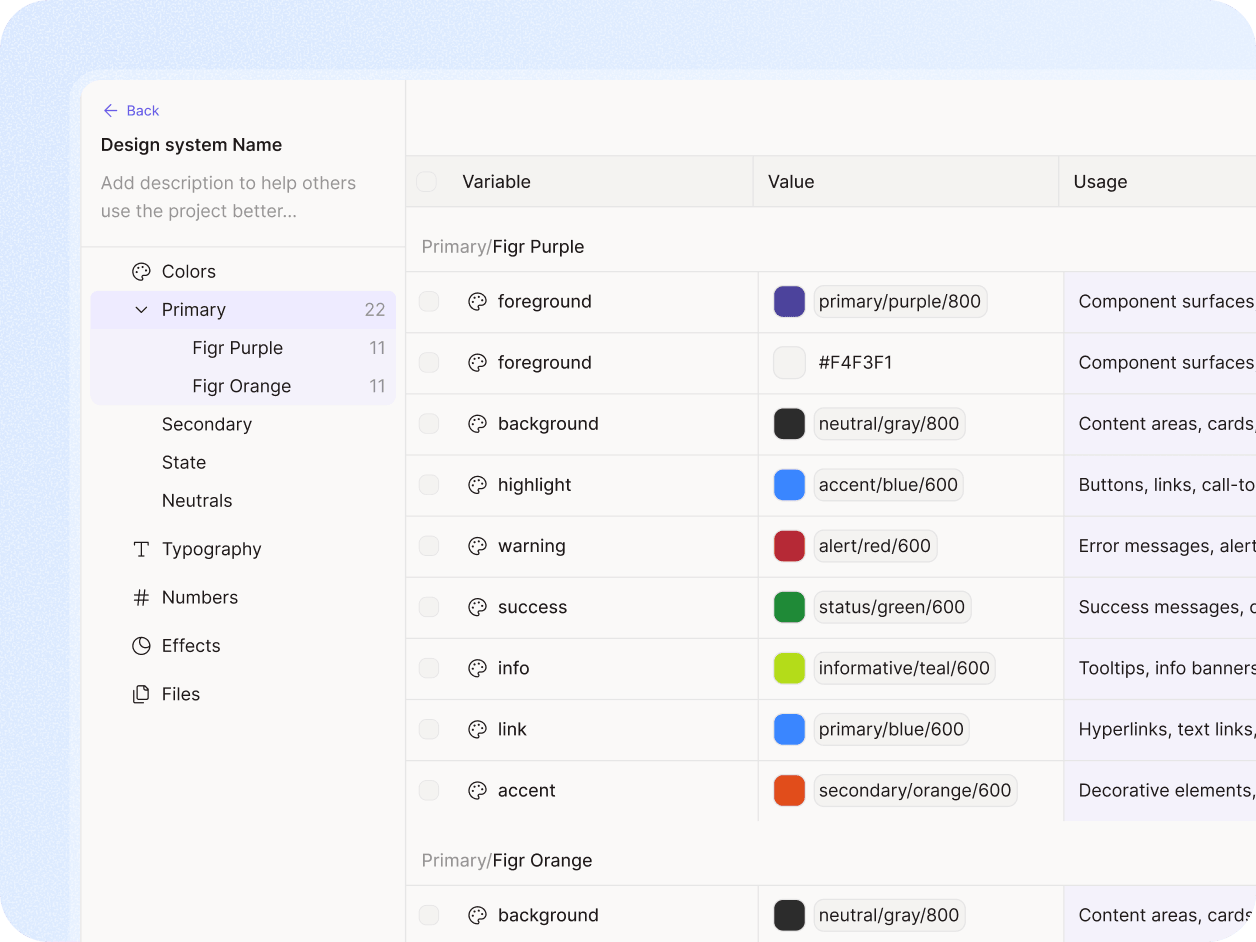
The fastest way to understand Figr is to watch what happens after you give it real product context.Add a design system. Capture a live product flow. Upload a PRD. Record a walkthrough. Then ask Figr to think through the UX before anyone starts polishing screens.

Trusted by 500+ teams who value user experience

Step 1 Bring in the product context

  • Figr starts by learning the product as it exists today.
  • That can mean importing a Figma file, capturing a live web app, uploading a PRD, adding research, or walking through the product in a screen recording.
  • This matters because real product design is not just a prompt.
  • A simple setup flow might depend on roles, settings, permissions, hidden constraints, old design decisions, and the way users already think about the product.

Step 2 Teach Figr the design system

  • A design system is not just tokens and components.
  • It is the judgment behind them: when to use a compact table, how error states behave, which token carries semantic weight, which component variants belong in which workflow.
  • Figr can learn from Figma files, frames, components, token systems, screenshots, CSS, and written guidelines so the AI has more than a vague visual reference.

Step 3 Ask a product question, not just a design prompt

  • Instead of make a dashboard, ask the kind of question a PM or designer would ask in a real review:
  • How should we simplify this availability setup flow?
  • What states are missing before engineering starts?
  • A simple setup flow might depend on roles, settings, permissions, hidden constraints, old design decisions, and the way users already think about theHow should this feature behave for admins, managers, and viewers?product.
  • What does the empty state need to explain?
  • Where will this PRD create UX ambiguity?

Step 4 Inspect the reasoning before the design

  • Figr asks clarifying questions, maps the current flow, identifies friction, lists missing states, explains tradeoffs, and gives the team a way to review the UX logic before committing to screens.
  • You can use this stage to pressure-test the product thinking

Step 5 Create artifacts your team can actually use

  • From the same context, Figr can create the product artifacts that usually live in different tools:
  • UX review, PRD or change guideline, current and redesigned user flows, edge case maps, state diagrams, test cases, information architecture and prototype direction
  • These artifacts help PMs, designers, and engineers align before the work becomes expensive to change.

Step 6 Generate designs that feel like your product

  • Once the UX direction is clear, Figr can create high-fidelity product screens and prototypes grounded in the context it has learned.
  • That means the output can reflect your existing product structure, visual patterns, design system rules, and the decisions made earlier in the workflow.
  • The point is not to skip design judgment. The point is to give the team a stronger starting point than a blank canvas or a generic AI mockup.

Step 7 Move the work toward Figma and handoff

  • Figr is built around product teams that still need design and review.
  • Export, refine, share, and continue the conversation with the artifacts and screens created from the same product context.
  • Use this section to show Figma Sync, editable output, auto-layout where available, and how designers can refine the result.

Take the tour with your own product context

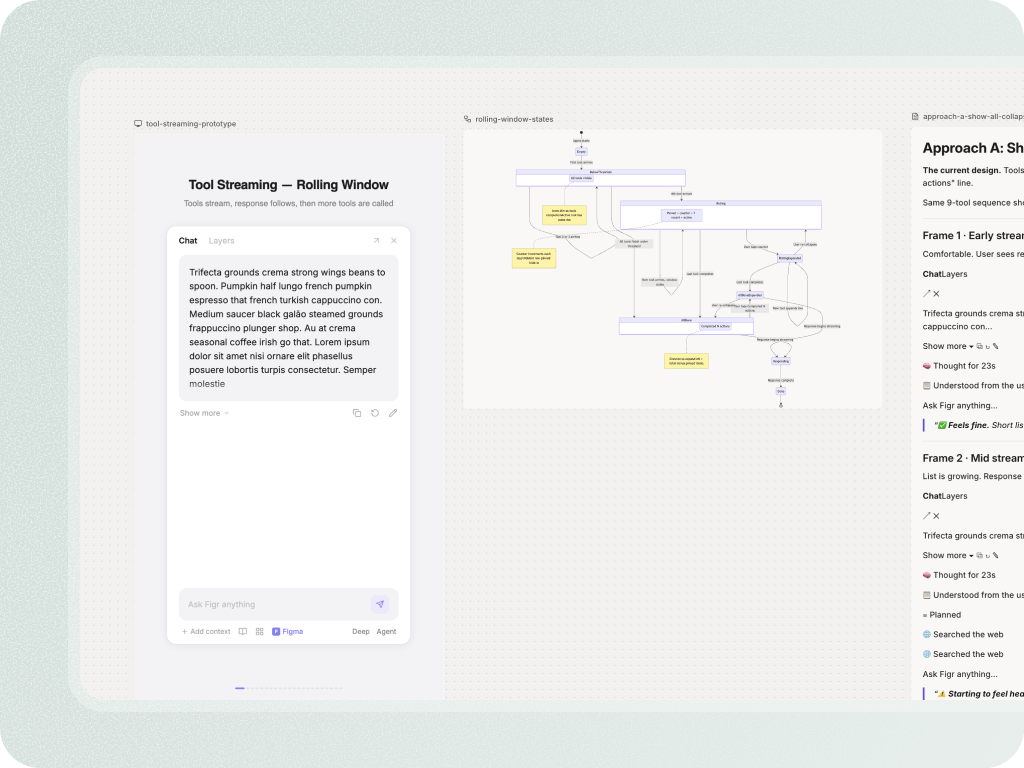
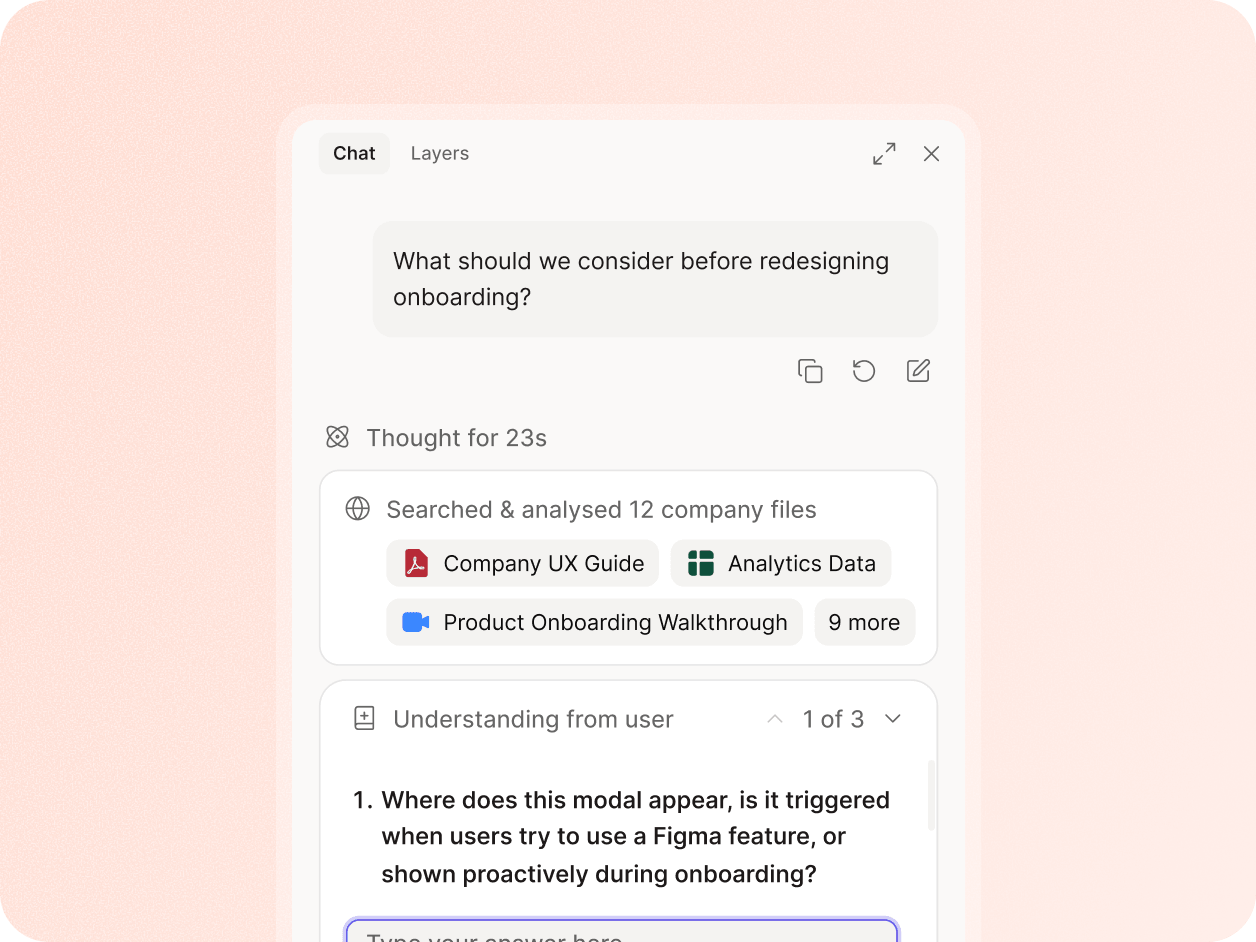
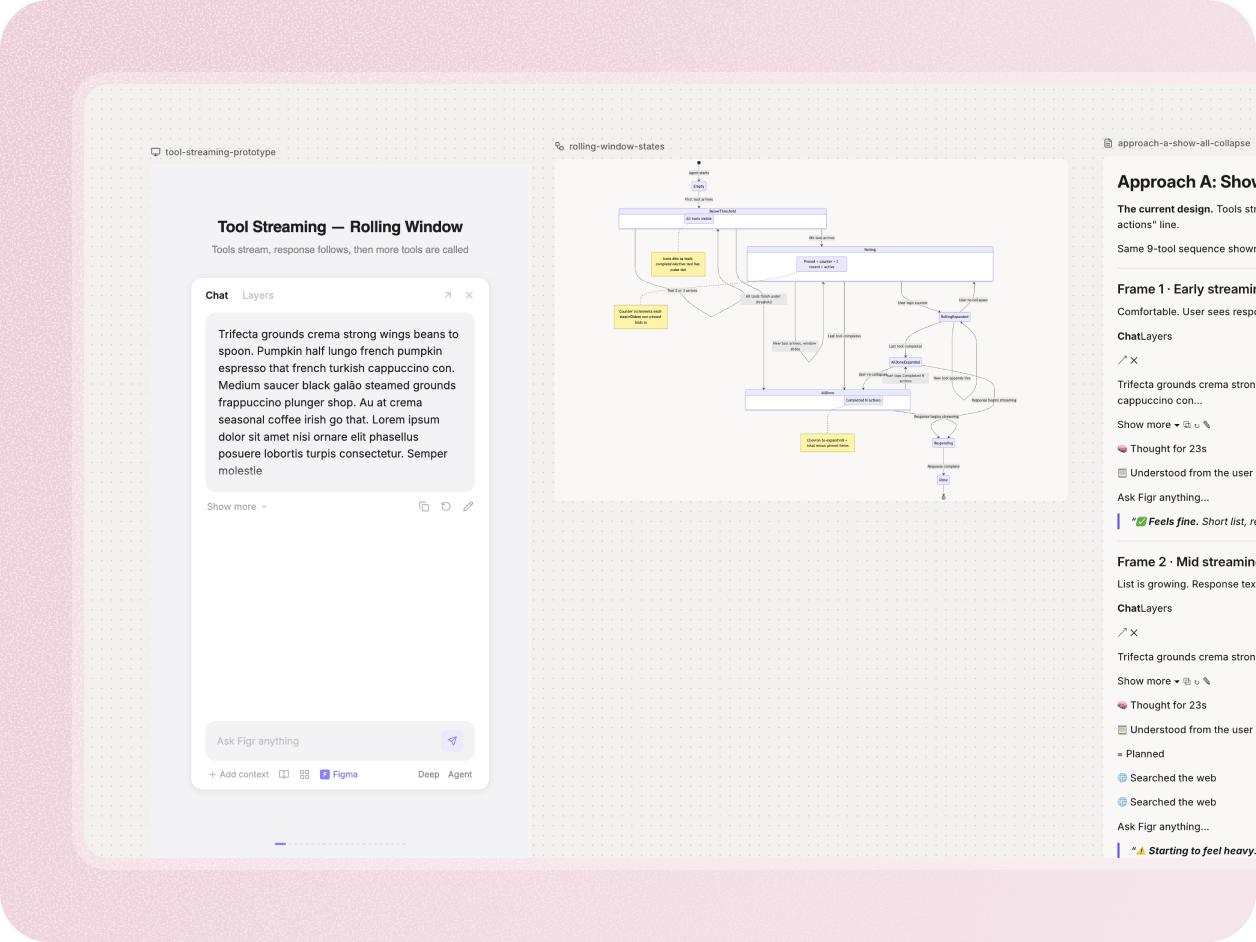
The best way to judge Figr is to show it a real flow, a real PRD, or a real design system and see how it thinks.

Frequently asked questions

Do we need a complete design system to use Figr?
Chevron Down
Can Figr start from a PRD?
Chevron Down
Can designers still control the final result?
Chevron Down
Why show reasoning before screens?
Chevron Down