When you start a new project, like building a house or launching a new business, it's crucial to know how much time and money you'll need.
In today’s world, where everything is online, businesses also need their designs to look good and work the same everywhere. This is where a design system comes in.
Think of it like a guidebook that helps designers and developers make sure everything you create looks and works the same way.
But figuring out how long and how much it will take to build these designs from scratch can feel like guessing. Many teams struggle because they lack a clear plan and rely on traditional methods that involve manual calculations and guesswork, leading to delays, errors, and wasted money.
However, an automated design system is different. It uses smart tools and data to make the design process faster, more accurate and ensures everything works smoothly across different platforms, like phones, tablets, or computers.
In this blog, we’ll guide you on how to estimate the time and cost of building a design system. You’ll also learn why automation is important and how it can make your design process easier and more efficient. We’ll go over each step, compare approaches, and give you actionable strategies to help you succeed.
What is a Design System
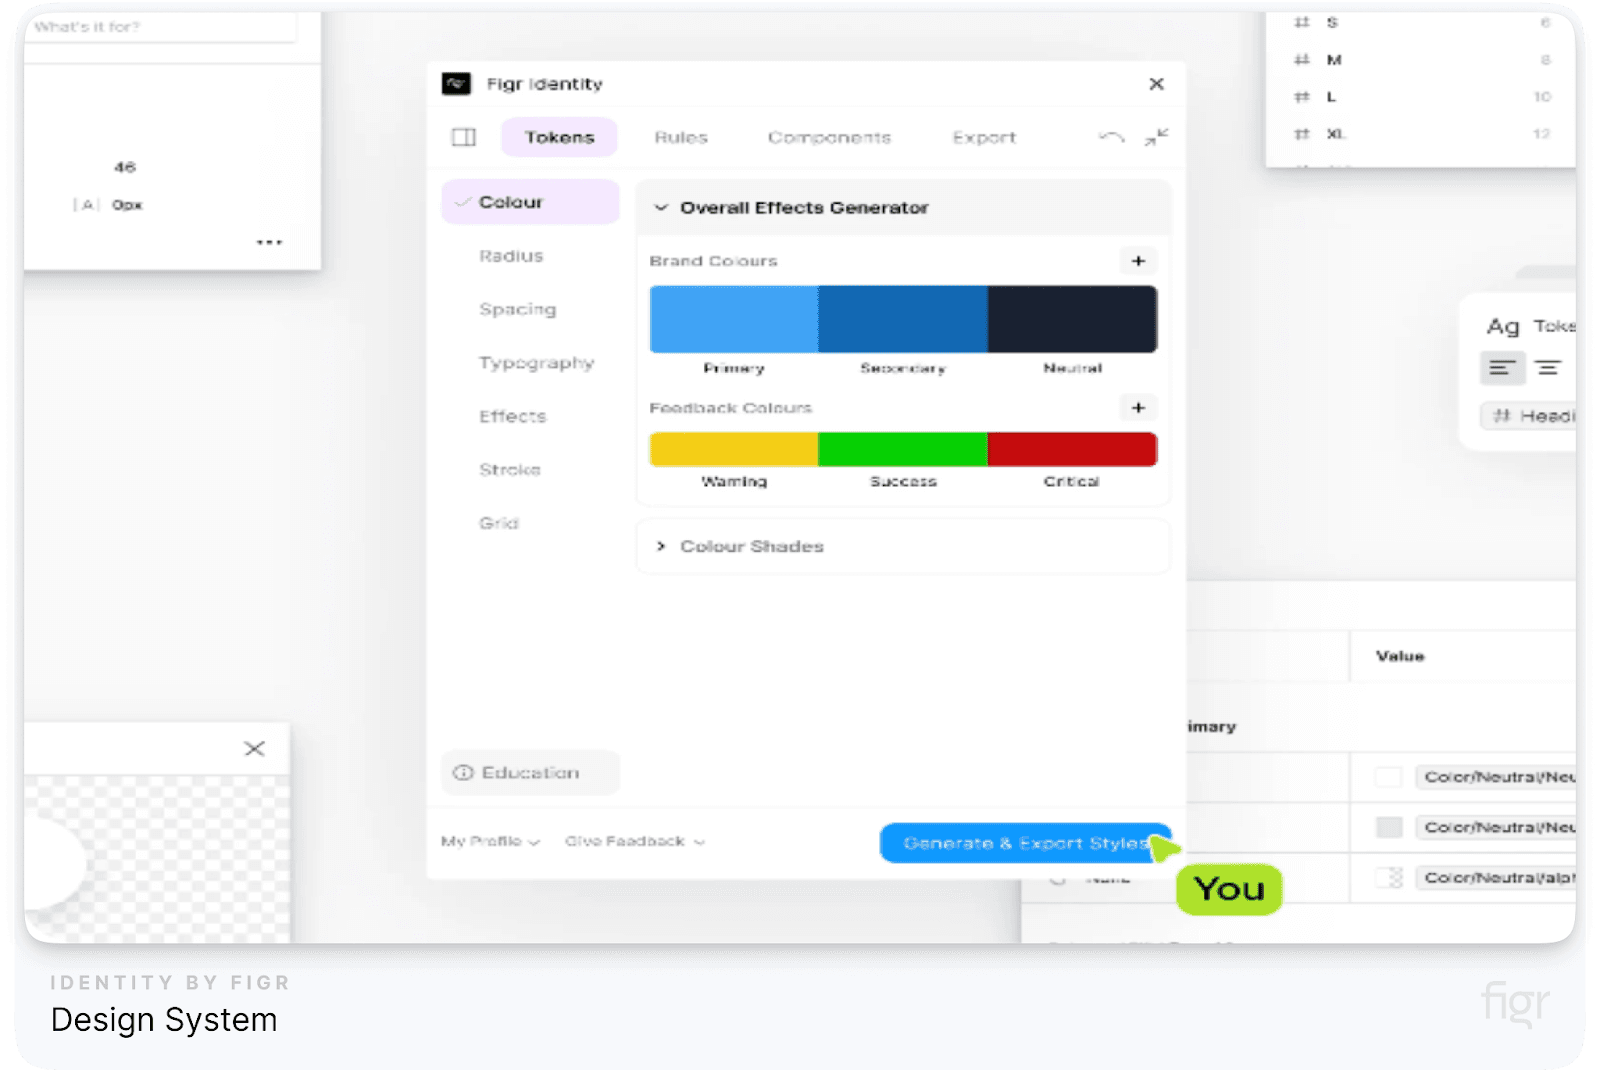
A design system is like a big rulebook that helps make sure websites, apps, and other products look and work the same way everywhere. Imagine it as a toolbox with all the tools you need—like colors, fonts, buttons, and layouts.
These tools help designers and developers build things that are consistent, so no matter if you're using a phone, tablet, or computer.
With a design system, teams can work faster, make fewer mistakes, and ensure everything looks great and works smoothly across different platforms.
Without it, things can get messy—like trying to put together a puzzle where none of the pieces fit, leaving gaps and brand inconsistency that confuse and frustrate users.
“The design system saved us 320,000 hours. ~ Case study from REA Group”
Key Design System Components
In a design system, each part plays an important role in ensuring everything looks and works consistently across all platforms. Here are the key design system Components:
- Colors: These are the main colors used in the product, like blue, red, or green. They help set the overall look and feel.
- Typography: This decides which font is used and how big or small it is, like choosing between Arial or Times New Roman.
- Spacing: Think of this as how much space is left around different parts of the design, making sure there’s enough room between buttons and text.
- Buttons: Every button on the website should look the same and behave the same way, like turning into a different color when you hover over it.
- Icons: These are small pictures or symbols, like arrows or checkmarks, used to guide users.
- Forms: Forms include elements like input boxes and dropdown menus where users type or select information.
- Grids and Layouts: This is the blueprint for how content is arranged on the screen, ensuring that everything lines up neatly.
- Animations: Animations control how things move, like a button sliding into place or a picture fading in when you scroll.
Each of these parts helps make sure your design stays clear, consistent, and user-friendly.
Steps for Estimating Design System Costs
To estimate the costs of creating a design system accurately, you need to follow a structured approach. Let’s follow these steps to collect data, guide your estimation, and use tools effectively.
1. Start with Data
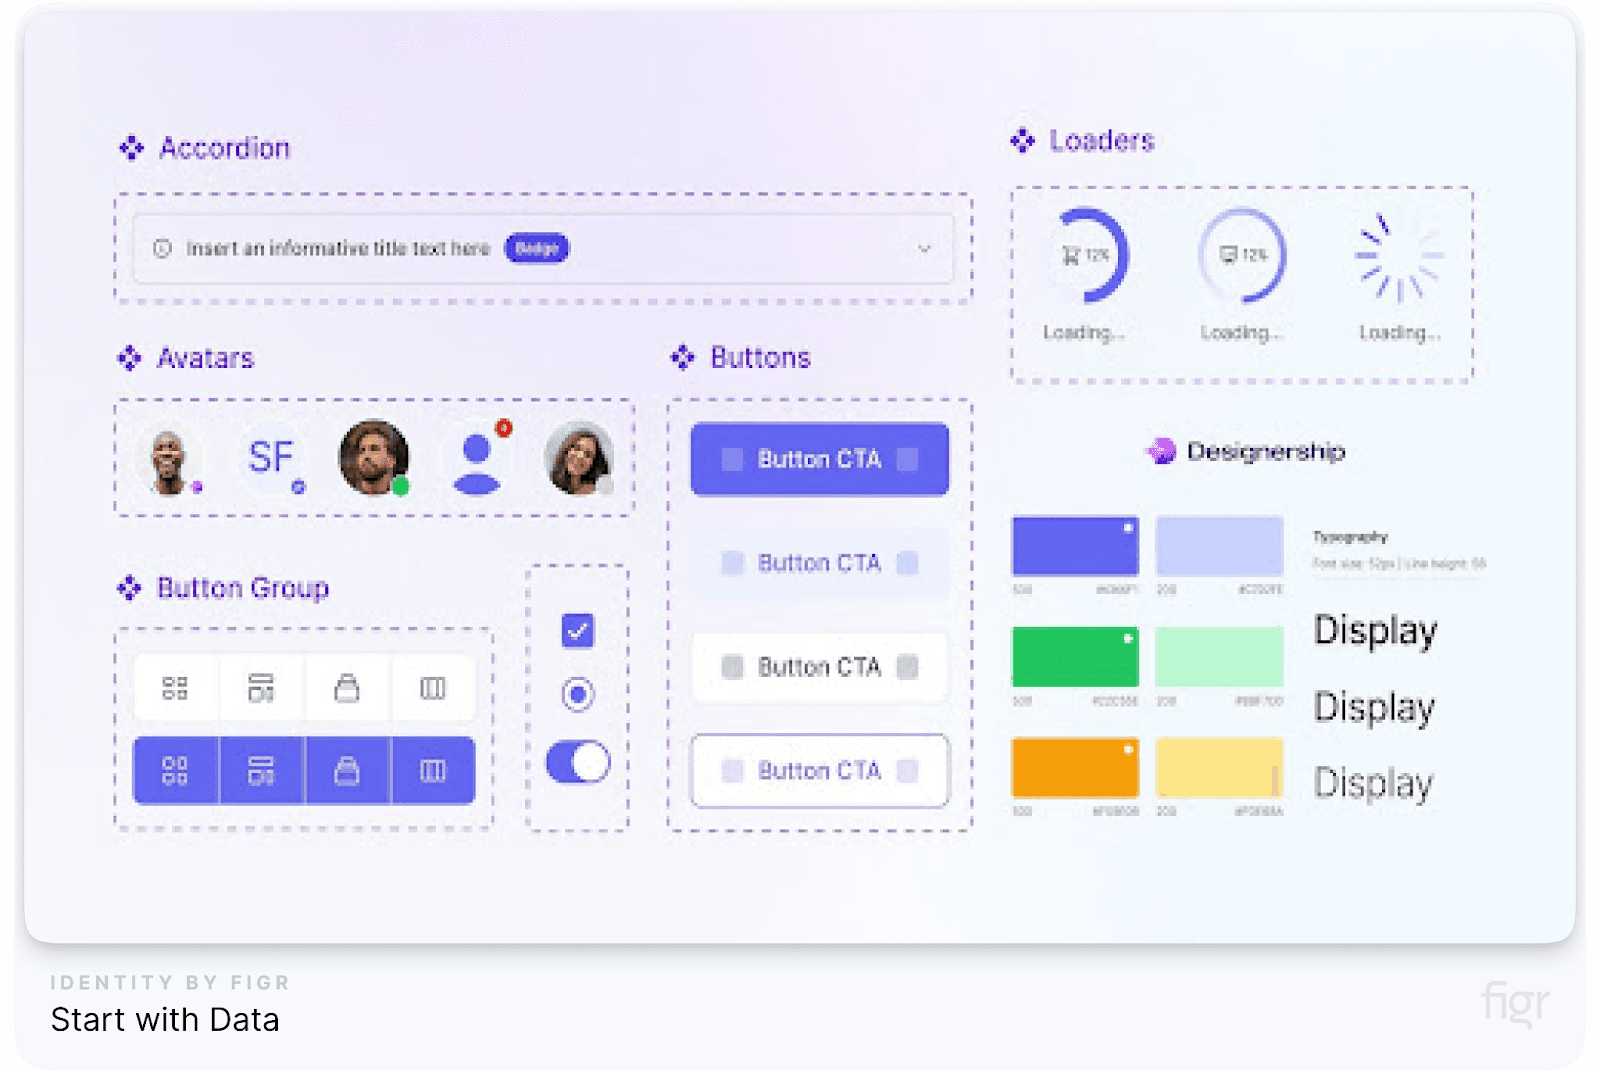
When creating a design system, understanding and defining design styles is crucial. This ensures that your product not only looks appealing but also functions consistently across various devices. Start by collecting detailed information about your project. This will help you understand the scope and requirements:
- Product Components: Determine the different parts of your design system. This includes everything from basic elements like buttons and icons to more complex elements like forms, navigation bars, typography, etc.
- Design Styles: Design styles are the visual themes that give your product its unique look and feel. These styles include elements such as color schemes, typography, and responsive design. Each of these components plays a crucial role in how users perceive and interact with your product.
- Complexity: Assess the intricacy of the components and styles. This will help you understand how much time and resources will be needed.
- Simple Components: Basic elements like buttons or text fields might require less time to design and develop.
- Complex Components: Advanced elements like interactive forms or custom animations may need more detailed planning and additional resources.
“Effective data collection sets realistic expectations.”
2. Ask Questions to Guide Data Gathering
To gather relevant data and to ensure a thorough estimation, ask questions which cover essential aspects of the project:
- Time for Design:
- How many design iterations are needed?
- How many hours will each design phase take?
- How long will it take to design each component and style?
- Engineering Time:
- How complex is the coding?
- Are there any integration challenges?
- How many hours for integration and testing?
- Handoffs and Communications:
- Average time for each handoff?
- How will design and engineering handoffs be managed?
- How many handoff points are there?
- How often are team meetings?
Use this information to create a detailed project timeline and budget.
3. Using Tools For Cost Projection
Now, several tools can assist you in creating accurate cost projections. Here are examples of how to use them effectively:
- Jira:
- Track time spent on each task and phase.
- Use historical data from similar projects to estimate future costs.
- Example: Create a project plan with milestones for the design, development, and testing phases.
- GitHub:
- Monitor development progress and track issues.
- Analyze past project data to understand typical development timeframes and costs.
- Example: Use GitHub issues to log tasks and measure the time spent on each component.
- Billable Hours:
- Calculate costs based on the number of hours spent by each team member.
- Sum up the hours estimated for each phase and multiply by hourly rates.
- Example: Track hours spent on design and development and apply hourly rates to estimate costs. So, if the design is estimated at 100 hours and the hourly rate is $50, then the total cost will be $5,000.
Here is an example of cost projection using Jira:

By following these steps and using the right tools, you can develop a well-informed estimate for the time and cost of creating a design system specifically tailored to your product's needs.
Overall Cost Calculation Methodologies
Now, when estimating the cost of a design system, you can choose between calculating the cost for the entire system at once or breaking it down by individual components.
Each method has its pros and cons, so understanding them can help you make better decisions for your project.
Cost of Entire Design System
Building an entire design system can be a game-changer for your brand. It ensures consistency, speeds up development, and creates a cohesive user experience. But the big question is—how much will it cost to build this system? Let’s break it down:
1. Design and Development Costs
The first major expense involves designing and developing all the components of the design system. These elements include buttons, icons, fonts (like how text appears), color schemes, and layouts.
- Design: This is about creating the visual style of each element. Designers craft a set of visual assets to ensure everything looks professional and fits together. For example, every button should have a consistent size, shape, and color across your website or app.
- Development: After designs are ready, developers turn them into code. This code needs to work across different devices (like phones and computers) and platforms. Developers also write reusable code so these components can be used in future projects without starting from scratch.
2. Project Management Costs
Even though design and development are essential, the project won’t manage itself! Project management costs refer to the money spent on organizing the entire process. This includes:
- Meetings: Regular check-ins ensure everyone—designers, developers, and stakeholders—stays aligned.
- Coordination: Ensuring that tasks are assigned to the right people and deadlines are met. This often involves hiring or assigning a project manager to oversee progress.
- Documentation: A well-documented design system is critical for its success. Good documentation explains how to use the design system, helping new team members understand it quickly.
3. Integration and Testing Costs
Building the system is just part of the job; making sure it works well is crucial. Integration and testing are critical steps to ensure the design system doesn’t just look good but functions well across all platforms.
- Integration: This involves making sure the design system fits smoothly into existing projects or tools, like React for websites or Flutter for apps.
- Testing: Once everything is developed, it needs to be tested to ensure there are no bugs or issues. This involves checking that each component works correctly and looks the same on different devices and screen sizes. Testing helps avoid costly mistakes later, such as broken features on a website or app that would require time and money to fix.
Estimated Time And Cost Of Creating A Design System:
Imagine you’re building a design system for an e-commerce website. Let’s estimate the costs:
- Design and Development:
- Designers: $50/hour, working for 20 hours = $1000
- Developers: $75/hour, working for 30 hours = $2250
- Total for this section = $3250
- Project Management:
- Project Manager: $40/hour, working for 15 hours = $600
- Meetings and Coordination: $1500 (estimate)
- Total for this section = $2100
- Integration and Testing:
- Integration Specialists: $60/hour, working for 10 hours = $600
- Testing (QA team): $45/hour, working for 10 hours = $450
- Total for this section = $1050
Grand Total Estimate for Entire Design System:
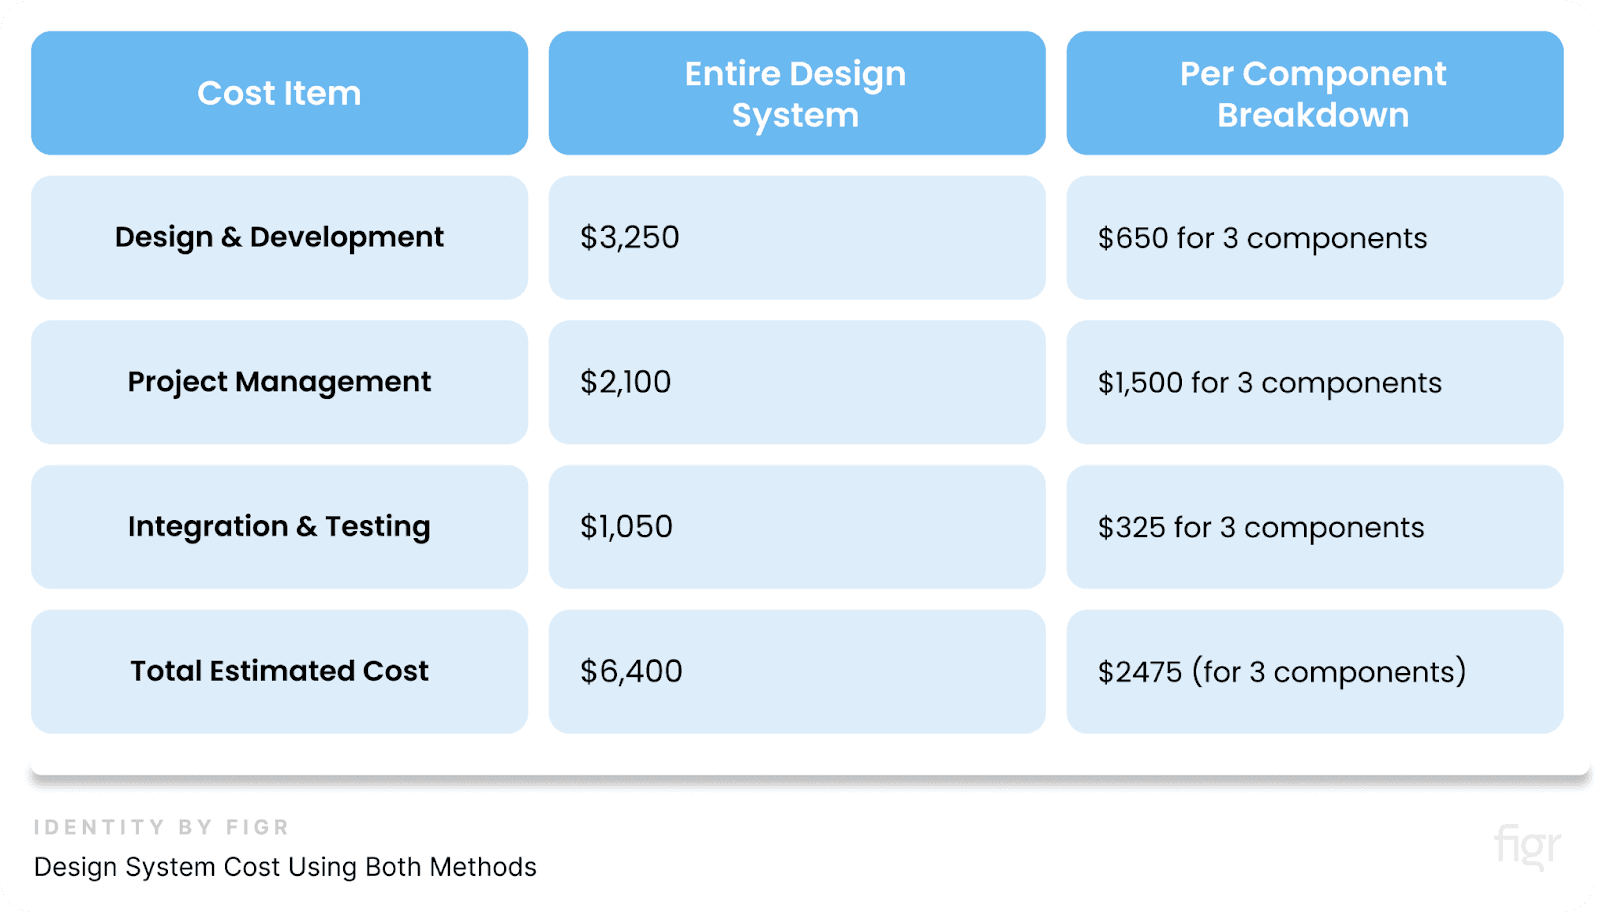
$3250 (Design and Development) + $2100 (Project Management) + $1050 (Integration and Testing) = $6400
This is just a rough estimate. The actual costs could vary depending on the complexity of the system and the rates of the professionals involved.
Advantages of Calculating the Entire Cost
- Big-Picture View: This method gives you a full picture of how much you’ll need to invest upfront. For large companies, this is extremely useful for budgeting. Knowing the entire cost from the beginning allows stakeholders to make informed decisions about whether to proceed, adjust, or prioritize certain components.
- Quick Budgeting: If you need to give an overall cost estimate to get the project approved, this approach is great for providing a high-level budget quickly. You can then go into more detail once the project starts.
Disadvantages of Calculating the Entire Cost
- Less Flexibility: This method doesn’t consider the unforeseen changes that might occur during the project. For example, if new technology comes out halfway through development, or if there’s a need to redesign components, the original cost estimate will become outdated.
- Lack of Detail: Since this method focuses on estimating the total cost, it doesn’t dive deeply into specific areas where you might be able to save money. For example, you might be able to reuse certain components from previous projects, reducing costs—but this wouldn't be obvious in an "entire cost" calculation.
- Risk of Inaccuracies: Because you’re estimating the entire cost from the beginning, there’s always a chance that some aspects of the project will cost more or less than expected. This could lead to significant budget overruns or savings, which would only be revealed once the project is underway.
By calculating the total cost of a design system upfront, you get a broad view of the investment needed. However, it’s important to understand both the benefits and limitations to make sure that the final design system aligns with your needs, budget, and timeline.
Cost of Design System As Per Component
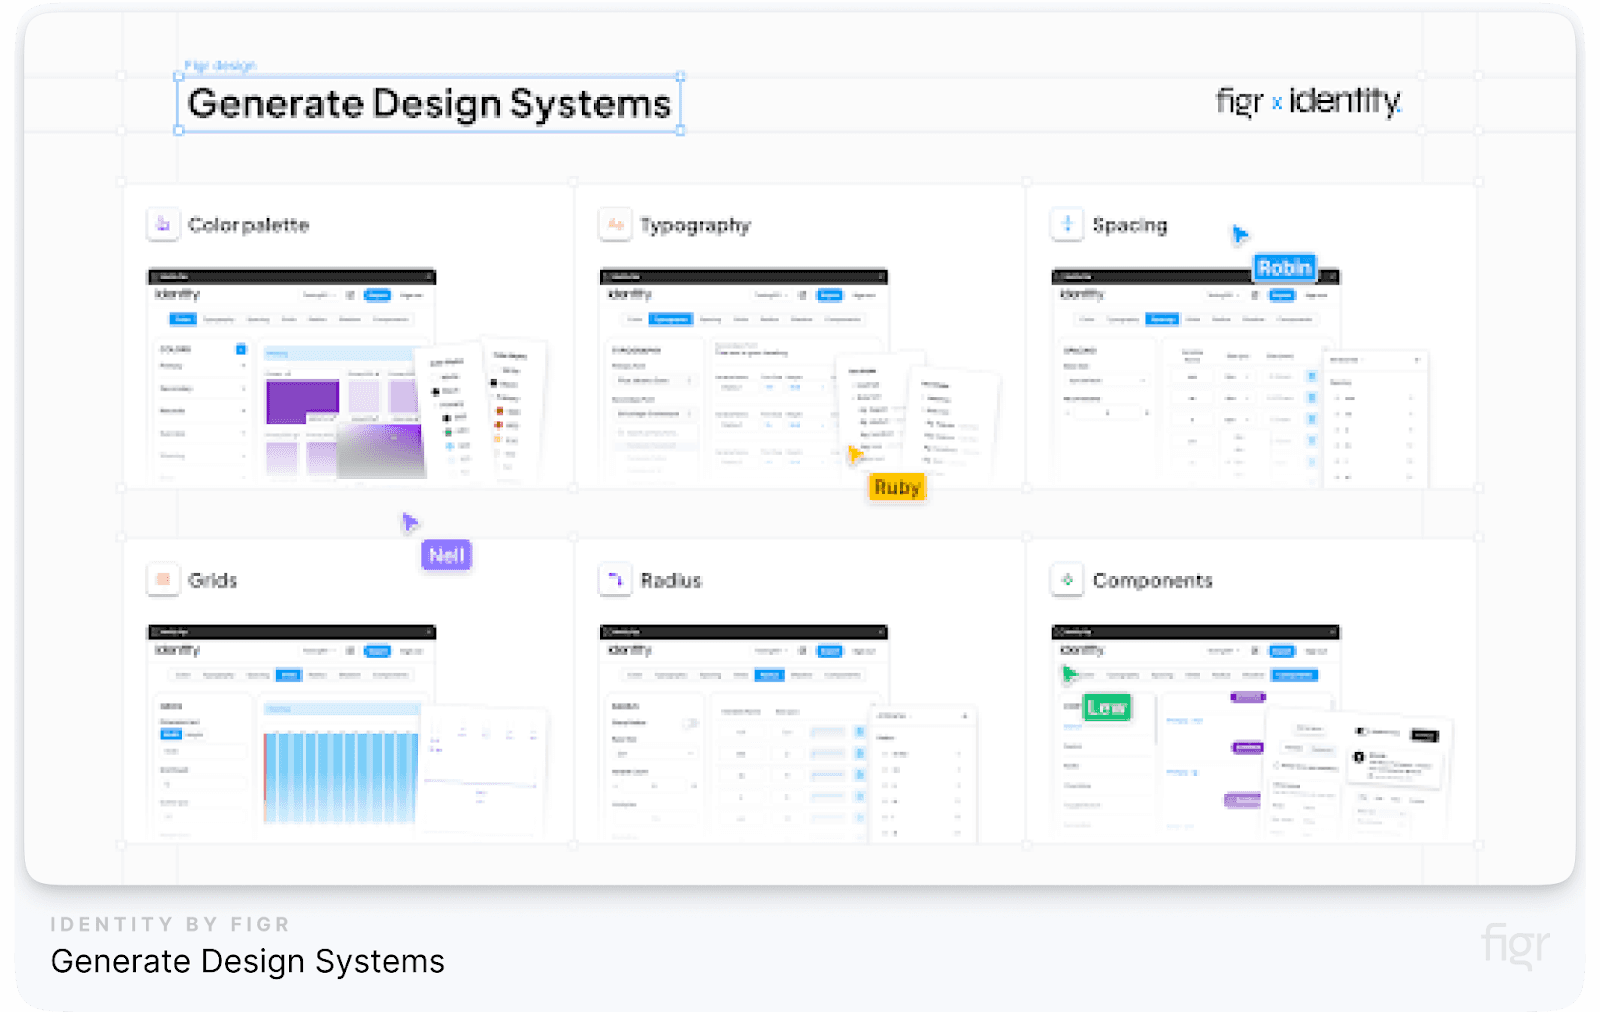
We looked at how you can estimate the cost of the entire design system, now let's take a look at how you can estimate the cost of the design system as per component.
This method gives you a detailed view of what each piece of the design system costs, from the initial design to the final testing. Here’s a complete breakdown of how to approach this:
Components Covered in Per Component Calculation
- Component Design: Designing each part of the design system involves creating visual elements. This includes:
- Button Design: The cost of designing various types of buttons, including their size, shape, color, and text. Each button must fit within the overall visual style of your application or website.
- Form Design: Designing different forms, such as registration forms or search bars. This includes layout, spacing, and ensuring the form is easy to use and visually appealing.
- Icon Design: Creating icons like home buttons or search magnifiers. Icons need to be simple yet expressive, fitting the overall design and enhancing user experience.
- Component Development: After the design is complete, each component must be developed with code. This involves:
- Button Development: Coding the functionality of buttons so they behave correctly when clicked or hovered over. Making sure they look good on different devices.
- Form Development: Writing code to handle form inputs, validations, and submissions. For example, making sure that a login form accepts user credentials and displays error messages if something goes wrong.
- Icon Development: Implementing icons into the design system so they function properly in different contexts, such as navigation menus or action buttons.
- Testing and Documentation: Ensuring each component works correctly and is easy to use involves:
- Testing: Checking that each component functions correctly and looks right on different devices and browsers.
- Documentation: Creating guides that explain how to use each component, so developers and designers know how to integrate them correctly.
Estimated Time And Cost Of Design System As Per Component
Let's say you're building a design system and want to estimate the cost for three components: buttons, forms, and icons. Here’s how you’ll calculate the costs:
- Design Costs:
- Button Design: $200
- Form Design: $300
- Icon Design: $150
- Total Design Cost = $200 (Button) + $300 (Form) + $150 (Icon) = $650
- Development Costs:
- Button Development: $500
- Form Development: $700
- Icon Development: $300
- Total Development Cost = $500 (Button) + $700 (Form) + $300 (Icon) = $1,500
- Testing and Documentation Costs:
- Button Testing and Documentation: $100
- Form Testing and Documentation: $150
- Icon Testing and Documentation: $75
- Total Testing and Documentation Cost = $100 (Button) + $150 (Form) + $75 (Icon) = $325
Grand Total Estimate for All Components:
$650 (Design) + $1,500 (Development) + $325 (Testing and Documentation) = $2,475
Advantages of Per Component Calculation
- Detailed Insights: This method gives you a clear picture of how much each part costs. For example, you’ll see that button design costs $200 and form development costs $700, helping you track where your money is going.
- Cost Reduction Opportunities: You can find ways to save money by looking at each part. If button design is expensive, you might simplify the design or use pre-made templates.
- Better Budget Management: Knowing the costs for each component helps you manage your budget better. If you need to cut costs, you can focus on specific components like reducing the number of form variations or simplifying icon designs.
Disadvantages of Per Component Calculation
- Time-Consuming: Tracking detailed costs for each component takes time and effort. You need to monitor each button, form, and icon separately, which can be labor-intensive and may require careful monitoring to avoid errors.
- Complexity in Summarizing Costs: Summarizing costs from all components into a total figure can be complex. You need to ensure that all individual costs are correctly added up to get an accurate total. This can be challenging and may lead to errors if not managed properly.
- Possible Overlook of Overall Costs: Focusing on individual components might lead to missing out on overall cost implications. For example, while you might save money on designing icons, you could overlook additional costs associated with integrating these icons into the larger design system, such as additional development time or testing.
Using a per-component approach helps you understand the costs for each part of your design system. While it can be detailed and time-consuming, it provides valuable insights into where money is being spent and where you might find savings.
Balancing this approach with an overall budget estimate ensures you manage your project efficiently and effectively
Here’s a summarized design system cost using both methods:
By using these methods and examples, you can choose the best way to estimate costs for your design system and make a solid plan for your project’s budget.
Qualitative Data Considerations
Now, when estimating the time and cost to create a design system, it's important to think beyond just numbers.
Numbers tell us about money and time, but qualitative factors help us understand how well the design system works, how easy it is to use, and its overall value.
Importance of the Design System Beyond Numbers
A design system is more than just a financial investment. Here’s why:
- Design Consistency and Brand Identity: A good design system ensures consistent branding across all platforms. This helps users know it’s your brand no matter where they see it, making your brand recall value stronger.
- Scalability and Flexibility: As your product grows, a well-designed system should adapt easily to new features. This adaptability isn’t always reflected in cost estimates.
- Developer Efficiency: A functional design system provides reusable components and guidelines, speeding up development and reducing errors.
"A design system’s real value is in how it enhances user experience and boosts long-term efficiency."
User Satisfaction and Collaboration Ease Assessments
To really know how good a design system is, you need feedback from the team members and from the people who use it. Here are a couple of ways to collect that feedback:
- Surveys: Surveys are great for getting quick feedback from users and team members. You could ask questions like:
- How easy is the design system to use?
- Does it improve collaboration between designers and developers?
- Interviews: Interviews allow you to ask more detailed questions. For example, you can ask team members about any problems they had using the design system or how it helped them work faster.
Onboarding Experience Evaluation
Making sure people can easily learn how to use the design system is important. So let’s break this down:
- Documentation Quality: This is like the instruction manual for your design system. It should be clear, easy to understand, and have examples to show how everything works.
- Training and Support: When someone starts using the design system, they might need help. Training sessions (like workshops or tutorials) and support (such as a help desk or a live chat) are important to make sure everyone understands how to use the system correctly.
You can use this Onboarding Experience Checklist:
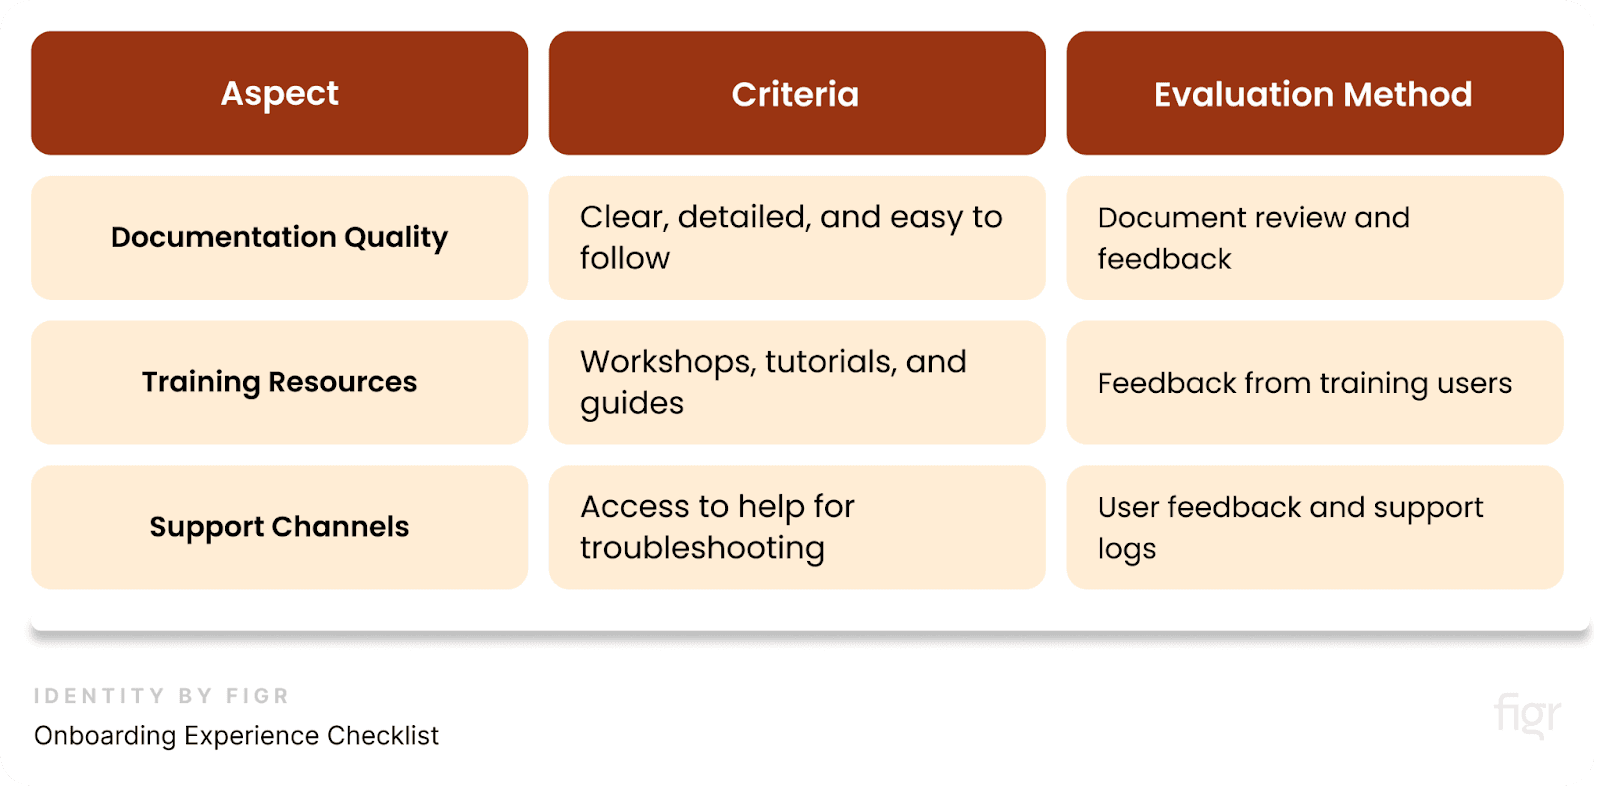
By focusing on these qualitative aspects—like ease of use, team collaboration, and effective onboarding—you ensure that the design system not only fits within the budget but also works well in practice, leading to better user experiences and improved team efficiency.
Key Assumptions in Estimations
When estimating the time and cost to build a design system, you need to make some assumptions to keep your estimates realistic. These assumptions help you understand both immediate and future costs.
1. Design System Lifespan and Major Revamps
First, think about how long the design system will last before it needs major updates or changes. This helps you plan for future work and costs.
- Lifespan: Estimate how long the design system will stay relevant:
- Short-term (1-2 years): You’ll probably just need small fixes or updates.
- Medium-term (3-5 years): You may need some big changes as design trends or technologies evolve.
- Long-term (5+ years): After five years or more, the design system might need a complete overhaul.
- Major Revamps: These are big updates that happen when:
- New technology or tools need to be integrated.
- The design style has changed so much that the system has to be redone.
2. Initial Costs, Ramp-up Time, and Maintenance
Here’s where you look at how much you’re going to spend at the start, how long it takes to get the design system up and running, and what it costs to keep it going.
- Initial Costs: This is the money you need to spend upfront to create and start using the design system.
- Development Costs: The cost of making the design system, including all the pieces like buttons, fonts, and guidelines.
- Implementation Costs: The cost of putting the design system into your existing workflow, and training the team
- Ramp-up Phase Duration: This is how long it takes before everyone on your team is using the system smoothly i.e. the design system is fully integrated and operational.
- Training Period: The time needed for your team to learn how to use the design system.
- Adoption Period: The time it takes for the system to be used in all of your projects.
- Maintenance Effort: Even after the design system is up and running, it needs to be updated and supported.
- Regular Updates: Keeping the design system current with new styles and technologies.
- Support and Troubleshooting: Helping people who run into problems while using the design system.
3. Productivity Gains During and After Ramp-up
This is all about how much faster and better your team will work once they start using the design system.
- During Ramp-up: At first, productivity might go down as everyone learns how to use the design system.
- Initial Learning Curve: The team might be slower while they figure out how to work with the new system.
- Short-term Adjustments: There might be a few hiccups as people get used to the new way of working.
- After Ramp-up: Once the team is comfortable with the system, expect productivity to improve.
- Increased Efficiency: Since everyone can reuse parts of the design system, like buttons or colors, they can work much faster and with fewer mistakes.
- Cost Savings: Less time spent on custom designs means lower costs over time.
By keeping these key assumptions in mind, you’ll be able to estimate the time and cost for your design system more accurately and be better prepared for what’s ahead.
Estimated Design System Costs Using Traditional Method
Image credit: Audrey Hacq
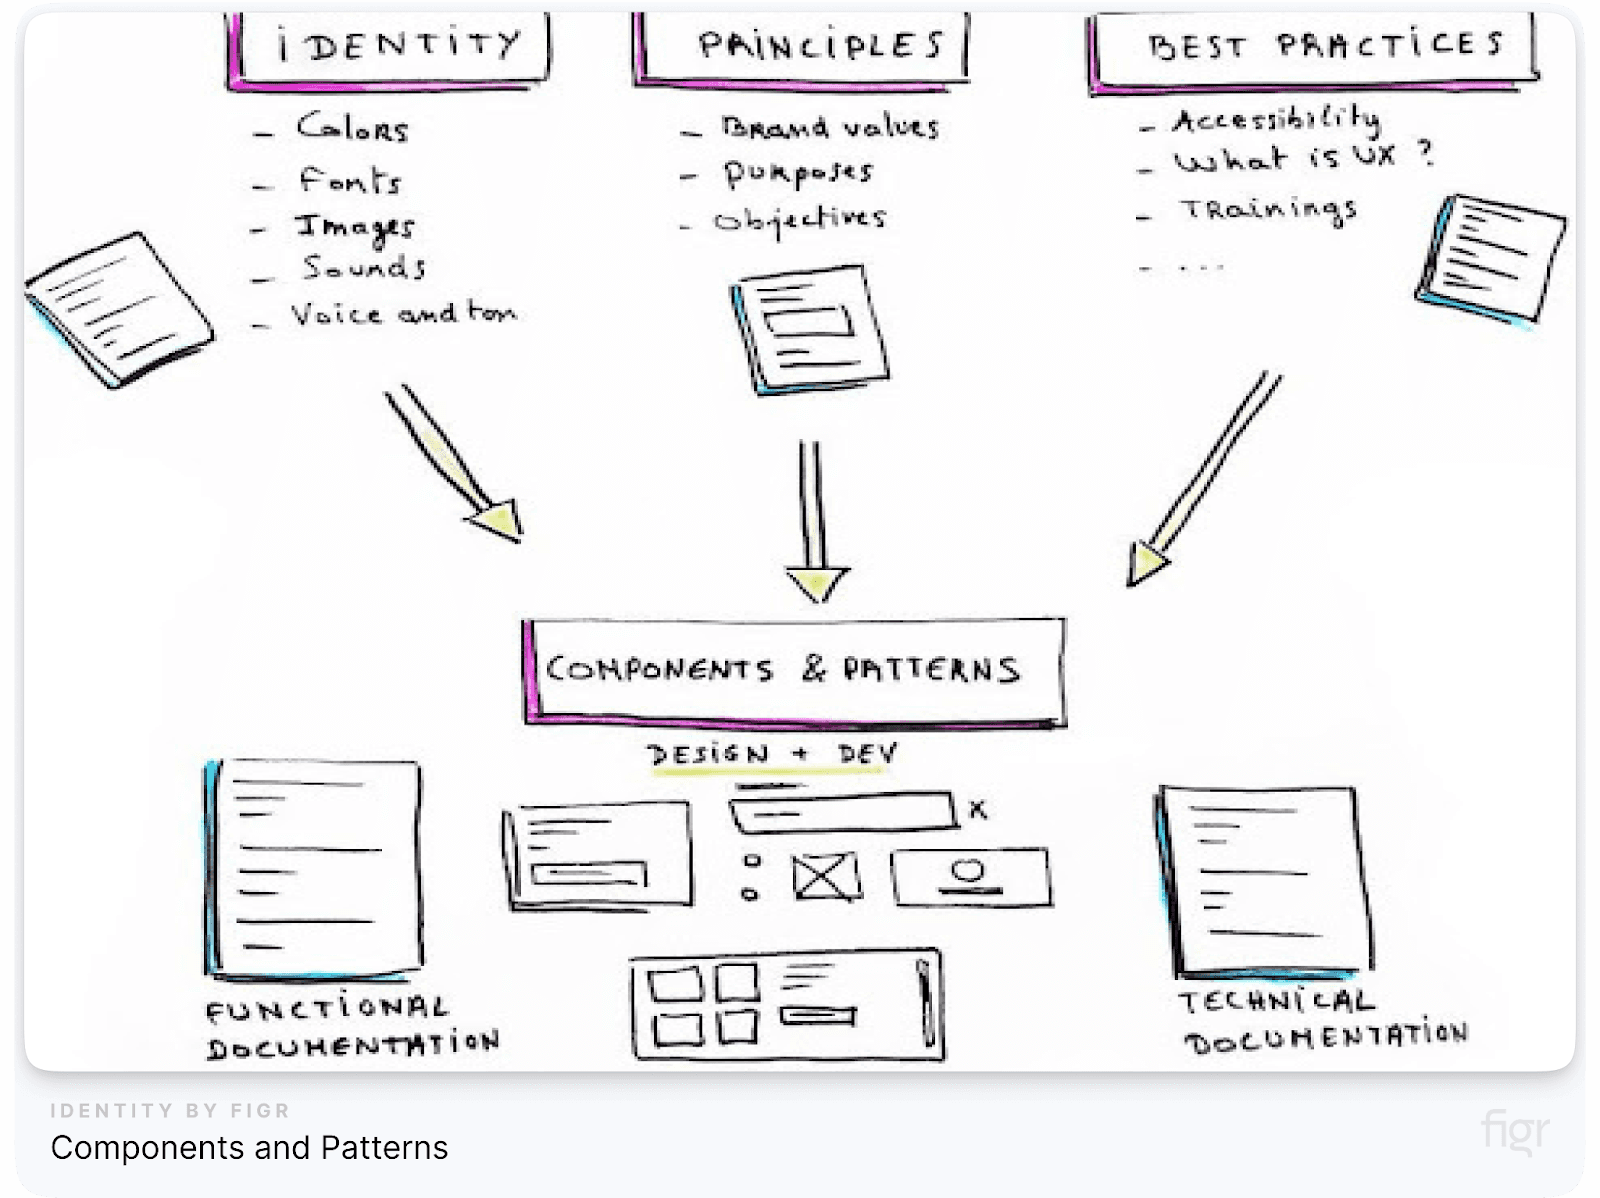
Traditional methods of building a design system rely on manual calculations and guesswork, which is time-consuming and often inaccurate.
When you follow traditional methods, here's how long each step takes with traditional methods, which cost around $6500:
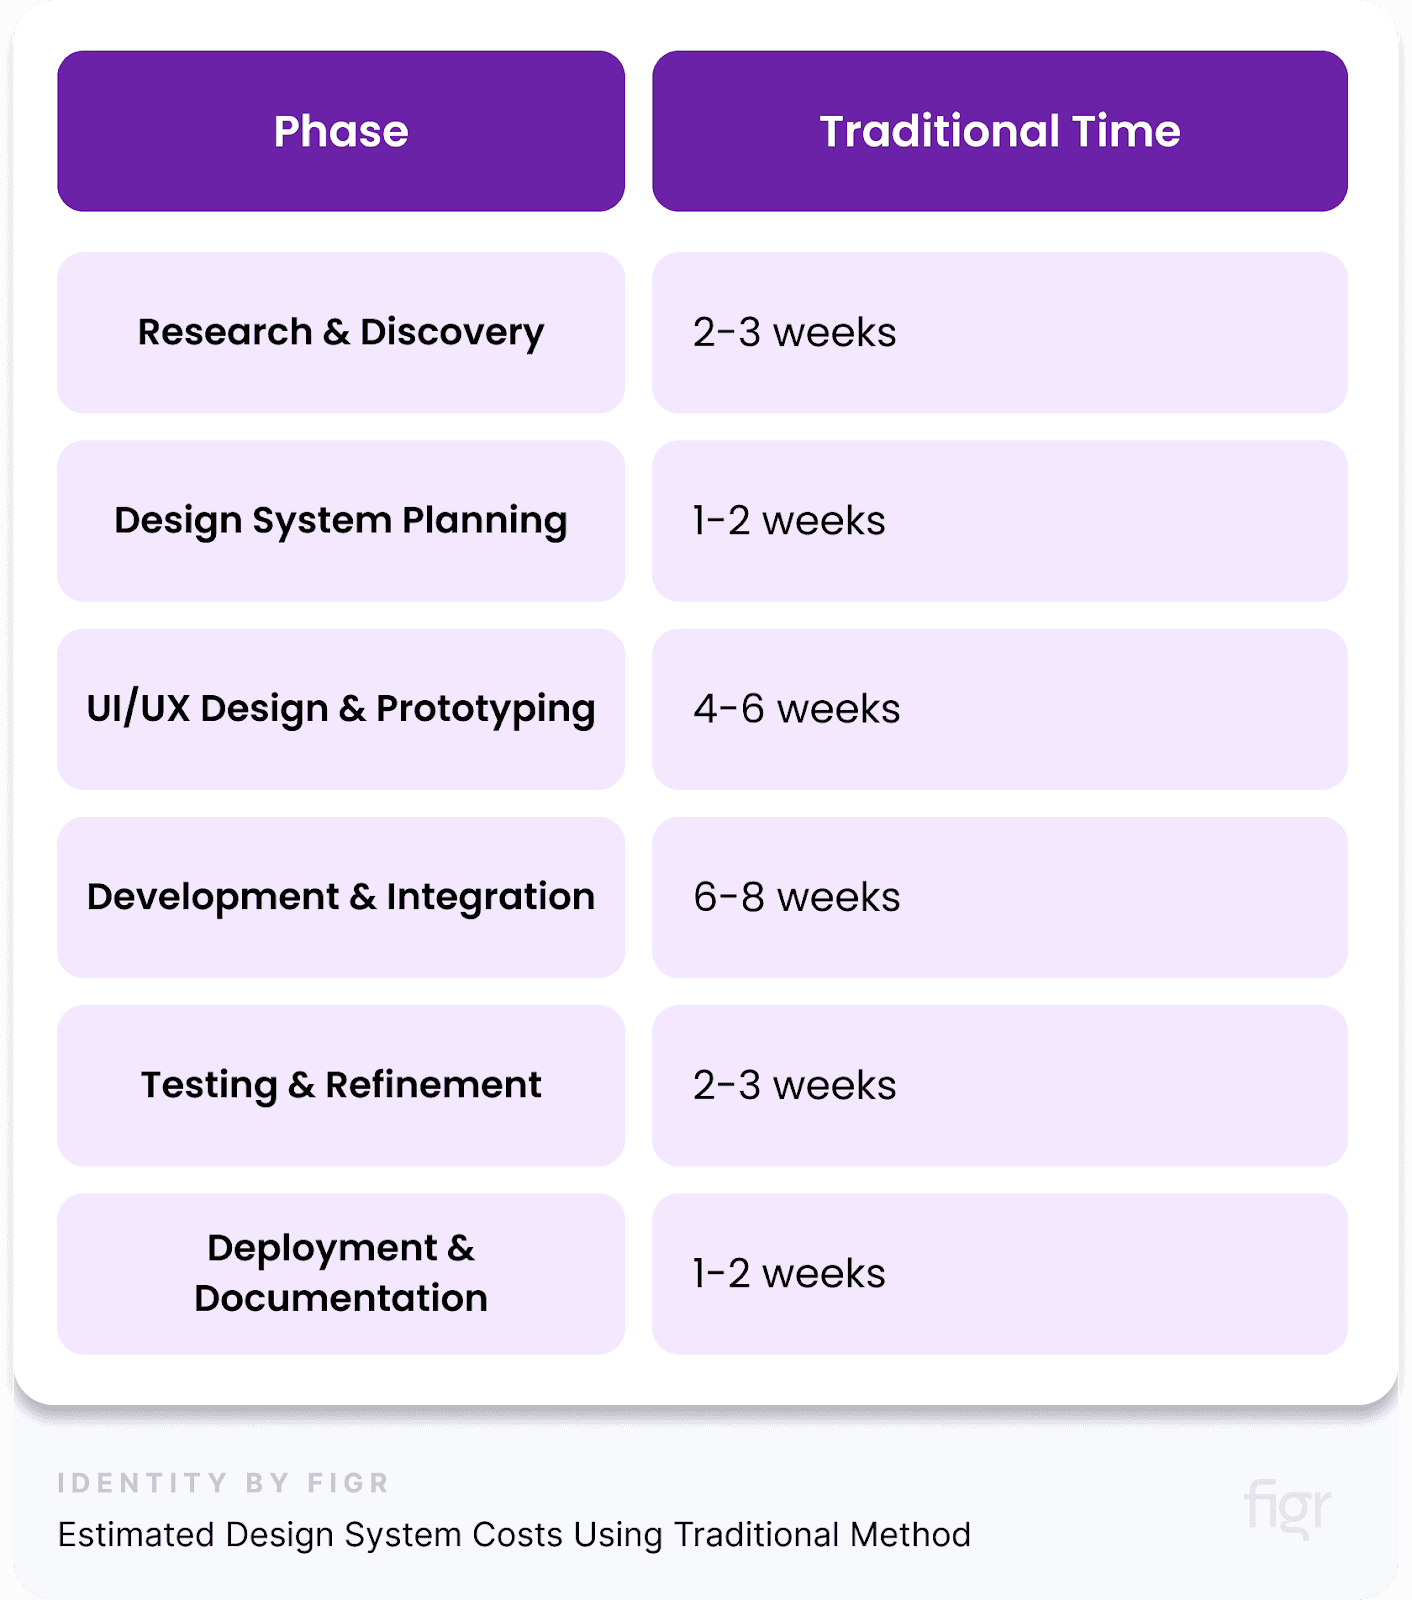
As you can see, this approach takes a lot of time because it requires constant back-and-forth between teams.
You need to coordinate multiple steps, and that can slow things down. Also, traditional methods often underestimate how complex things will get during testing, integration, and documentation, making the process not only slow but more expensive.
Traditional methods rely on manual calculations and guesswork, which is time-consuming and often inaccurate.
These methods include various phases like research, design, development, and testing, each with its own time and cost estimates. Plus, what works for one project might not work for another, making the process even harder.
Estimating Design System Costs Using Automation Tools
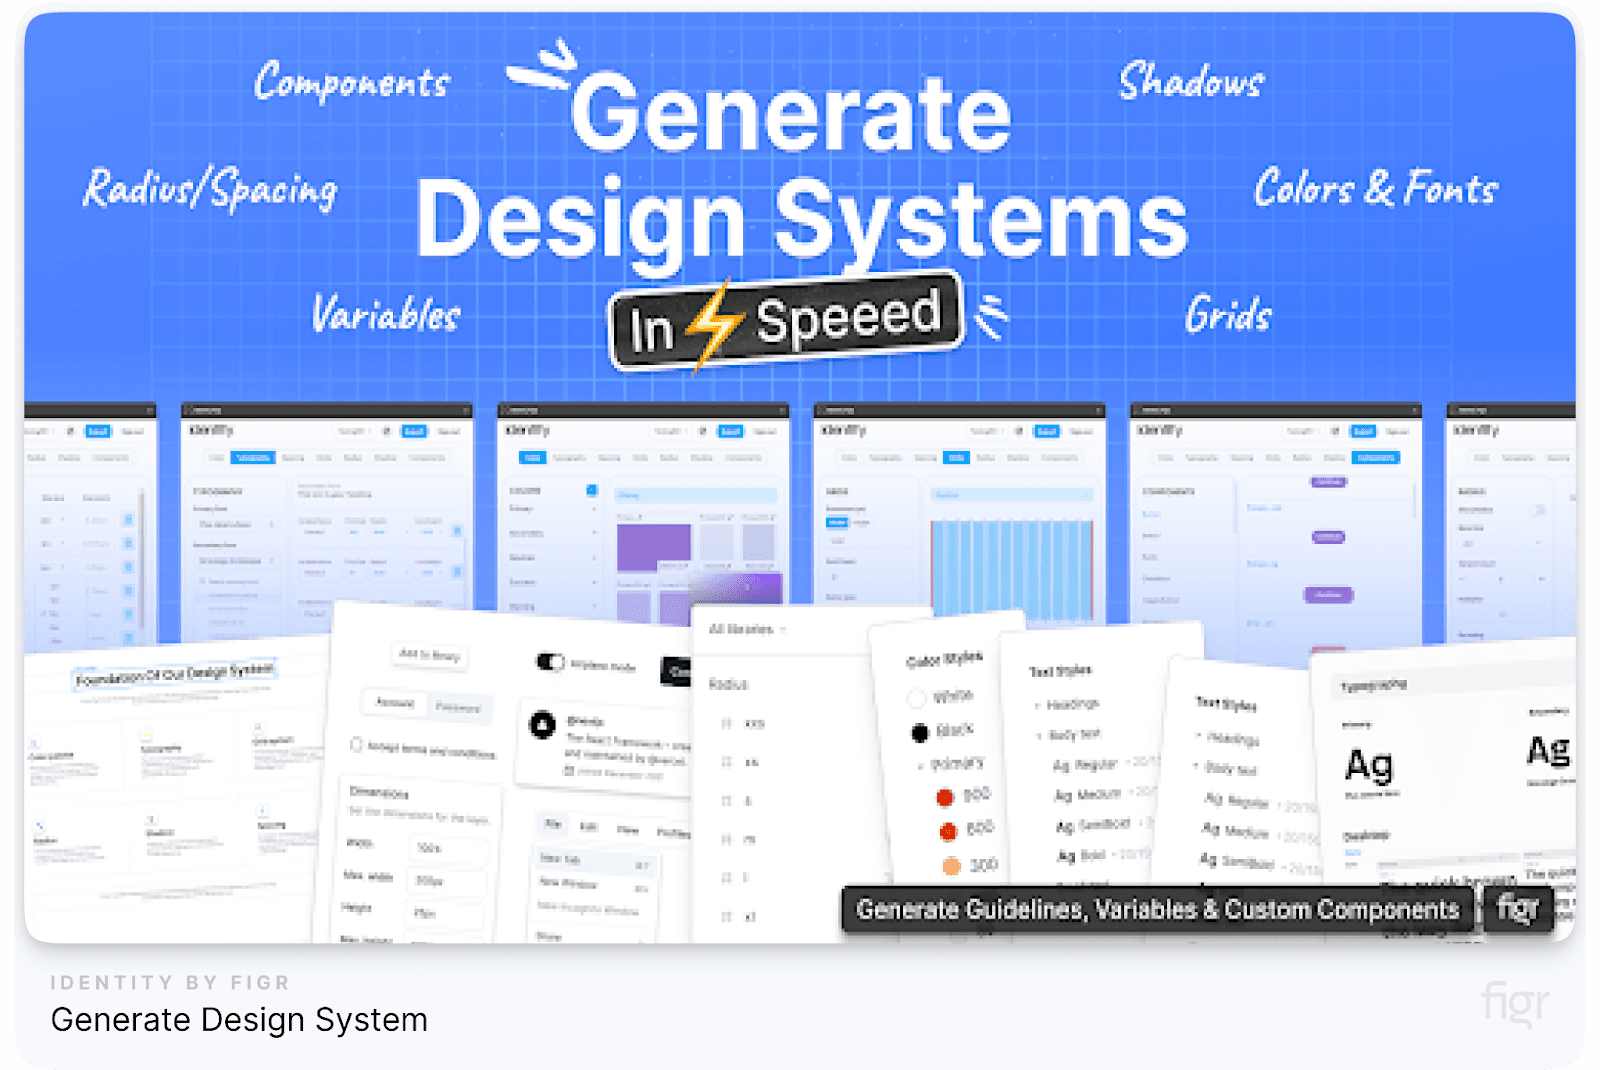
While the traditional method is the norm for many companies, automation products like Figr offer a more efficient and accurate alternative. Figr streamlines the entire process, allowing teams to estimate design system costs faster, with more precision, and fewer manual interventions.
Instead of wasting time on guesswork, Figr uses data and tracks key design system metrics to accurately predict what your design system needs and when it will be ready.
How Figr Revolutionizes Cost and Time Estimation
Figr's automation features allow for:
- Real-Time Data Analysis: It uses key design system metrics to provide accurate estimates.
- Reduced Time Spent on Manual Tasks: Figr cuts down on time-intensive phases like research, prototyping, and testing by offering pre-built components and tracking.
- Flexibility and Scalability: The automation adapts to project complexity, meaning you save more time on larger projects.
Cost and Time Savings with Figr
By using Figr, you can significantly reduce the time spent in each phase:

Not only does Figr save time, but it also results in reduced costs, as fewer iterations are needed, and many of the tasks are automated.
The traditional way of estimating design systems is outdated, costly, and inefficient. New-age automation products like Figr offers a better, faster, and more accurate method, saving you time, money, and effort.
Tools and Applications for Tracking Design Systems
Everything’s great up until now, but to manage your design system effectively, you need to choose the right tools.
These tools help maintain consistency, track performance, and ensure the system works as intended.
Selection of Appropriate Tools Based on Team’s Needs
Choosing the right tool depends on what your team needs. Different tools do different things and offer various features tailored to specific needs, so it’s important to know which features are best for your project.
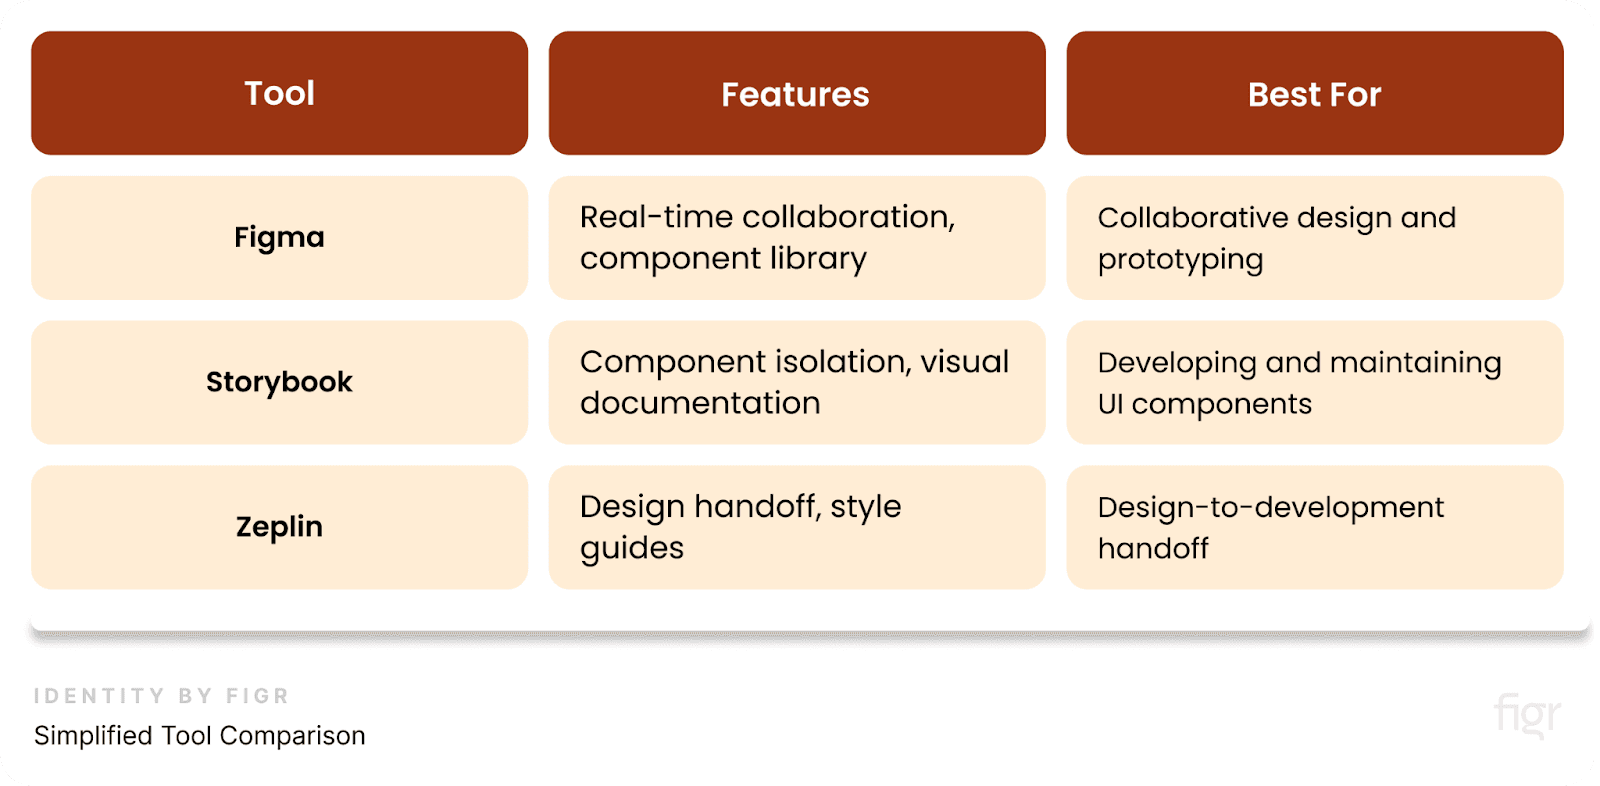
So, here’s a comparison of popular tools:
Figma
A tool that lets your whole team design together at the same time. It also allows you to test how your design will look and work in real-time.
Strengths:
- Real-time Collaboration: Think of Figma as working on a group project where you and your friends can all see and change the project simultaneously. It allows everyone to see updates instantly, chat, and make edits together. This is great for teams that need to stay synchronized, even if they’re working from different locations.
- Component Library: Figma lets you create a collection of reusable design elements like buttons and icons. This is where Figr shines the best. Figr identity makes design system creation and management easy, fast, and effective and adds even more power to Figma. It's beginner-friendly, easy to use and seamlessly integrates with Figma which keeps your design consistent and saves you time.

- Design System Integration: Figma acts as a central hub for all your design needs. It helps you build and manage your design system, so you can keep track of styles, components, and other elements all in one place.
Ideal For:
- Teams that want to work together at the same time and need real-time collaboration and cloud-based design.
- Projects that need frequent updates and sharing of design components.
Storybook
An open-source tool for developing and testing UI components in isolation, often used for building and maintaining component libraries.
Strengths:
- Component Isolation: Test individual design elements without affecting the whole project.
- Visual Documentation: Displays how each component looks and works.
- Integration with Frameworks: Works with popular frameworks like React, Vue, and Angular.
Ideal For:
- Teams that want to focus on building and testing parts of the design.
- Projects that need strong testing and clear documentation.
Zeplin
Zeplin is a tool that helps designers and developers work together more smoothly by providing style guides and assets.
Strengths:
- Style Guides: Automatically generates style guides from design files, so developers know exactly how things should look.
- Asset Management: This makes it easy to share design assets with developers.
Ideal For:
- Teams that need to bridge the gap between design and development.
- Projects where clear style guidelines and asset management are important.
Here’s a simplified Tool Comparison table so that you can choose the tool that's best suited for your needs.
Design System Metrics and Visual Regression Testing

Tracking your design system metrics isn’t just about keeping everything organized — you also want to know if it’s performing well and staying consistent. Here’s how to do that:
1. Component Usage: Keep an eye on how often different pieces of your design system, like buttons or forms, are used.
- Usage Statistics: This helps you see which parts are used the most.
- Update Frequency: Track how often pieces of the design system are updated.
2. Design Consistency: Make sure the designs look the same everywhere.
- Style Guide Adherence: Check that the designs match the rules in your style guide.
- Consistency Checks: Regularly review to make sure everything is staying consistent.
3. Performance Metrics: Measure the impact of the design system on project timelines and team efficiency.
- Time Savings: Calculate how much faster your team works by reusing pieces of the design system.
- Error Rates: Track how much the system reduces mistakes in design and development.
4. Visual Regression Testing
Visual Regression Testing is a way to check if something in the design changes by mistake when updates are made.
Tools for Visual Regression Testing
- Percy: Works with Storybook and other tools to check for visual changes.
- BackstopJS: A flexible tool for finding visual problems.
- Applitools: Uses AI to catch even the smallest visual issues.
Benefits:
- Early Detection: Find problems early before they mess up the project.
- Consistency Assurance: Make sure designs stay the same, even after updates.
Conclusion
Estimating the time and cost of building a design system is like solving a puzzle where you need to piece together both numbers and the right tools to see the full picture.
By carefully considering different methods and using the right tools, you can create a more accurate plan and ensure your design system works well.
To simplify this process and enhance your workflow, try using Figr. Figr helps you manage design components, improve collaboration, and streamline updates, making your design system development smoother and more effective. With Figr, you'll save time, avoid costly mistakes, and make better-informed decisions.
So, are you ready to simplify and transform the creation of your design system?
Stop guessing and start using data, smart tools, and expert tips to hit your goals. With Figr, you’ll boost teamwork, save time, and avoid costly mistakes.
Make better, informed choices for your design system now, and see how Figr can transform your workflow! Contact us today to get you started seamlessly into your design creation journey!

